
Minimal Kit, Maximum Freedom: Building a Lightweight 2025 Hiking Camera Setup That Still Delivers Pro-Level Landscapes
Hiking with a camera should feel simple and light. A minimal camera kit gives you maximum freedom on the trail. You can move faster, stay safer, and still bring home sharp, pro-level landscape photos.
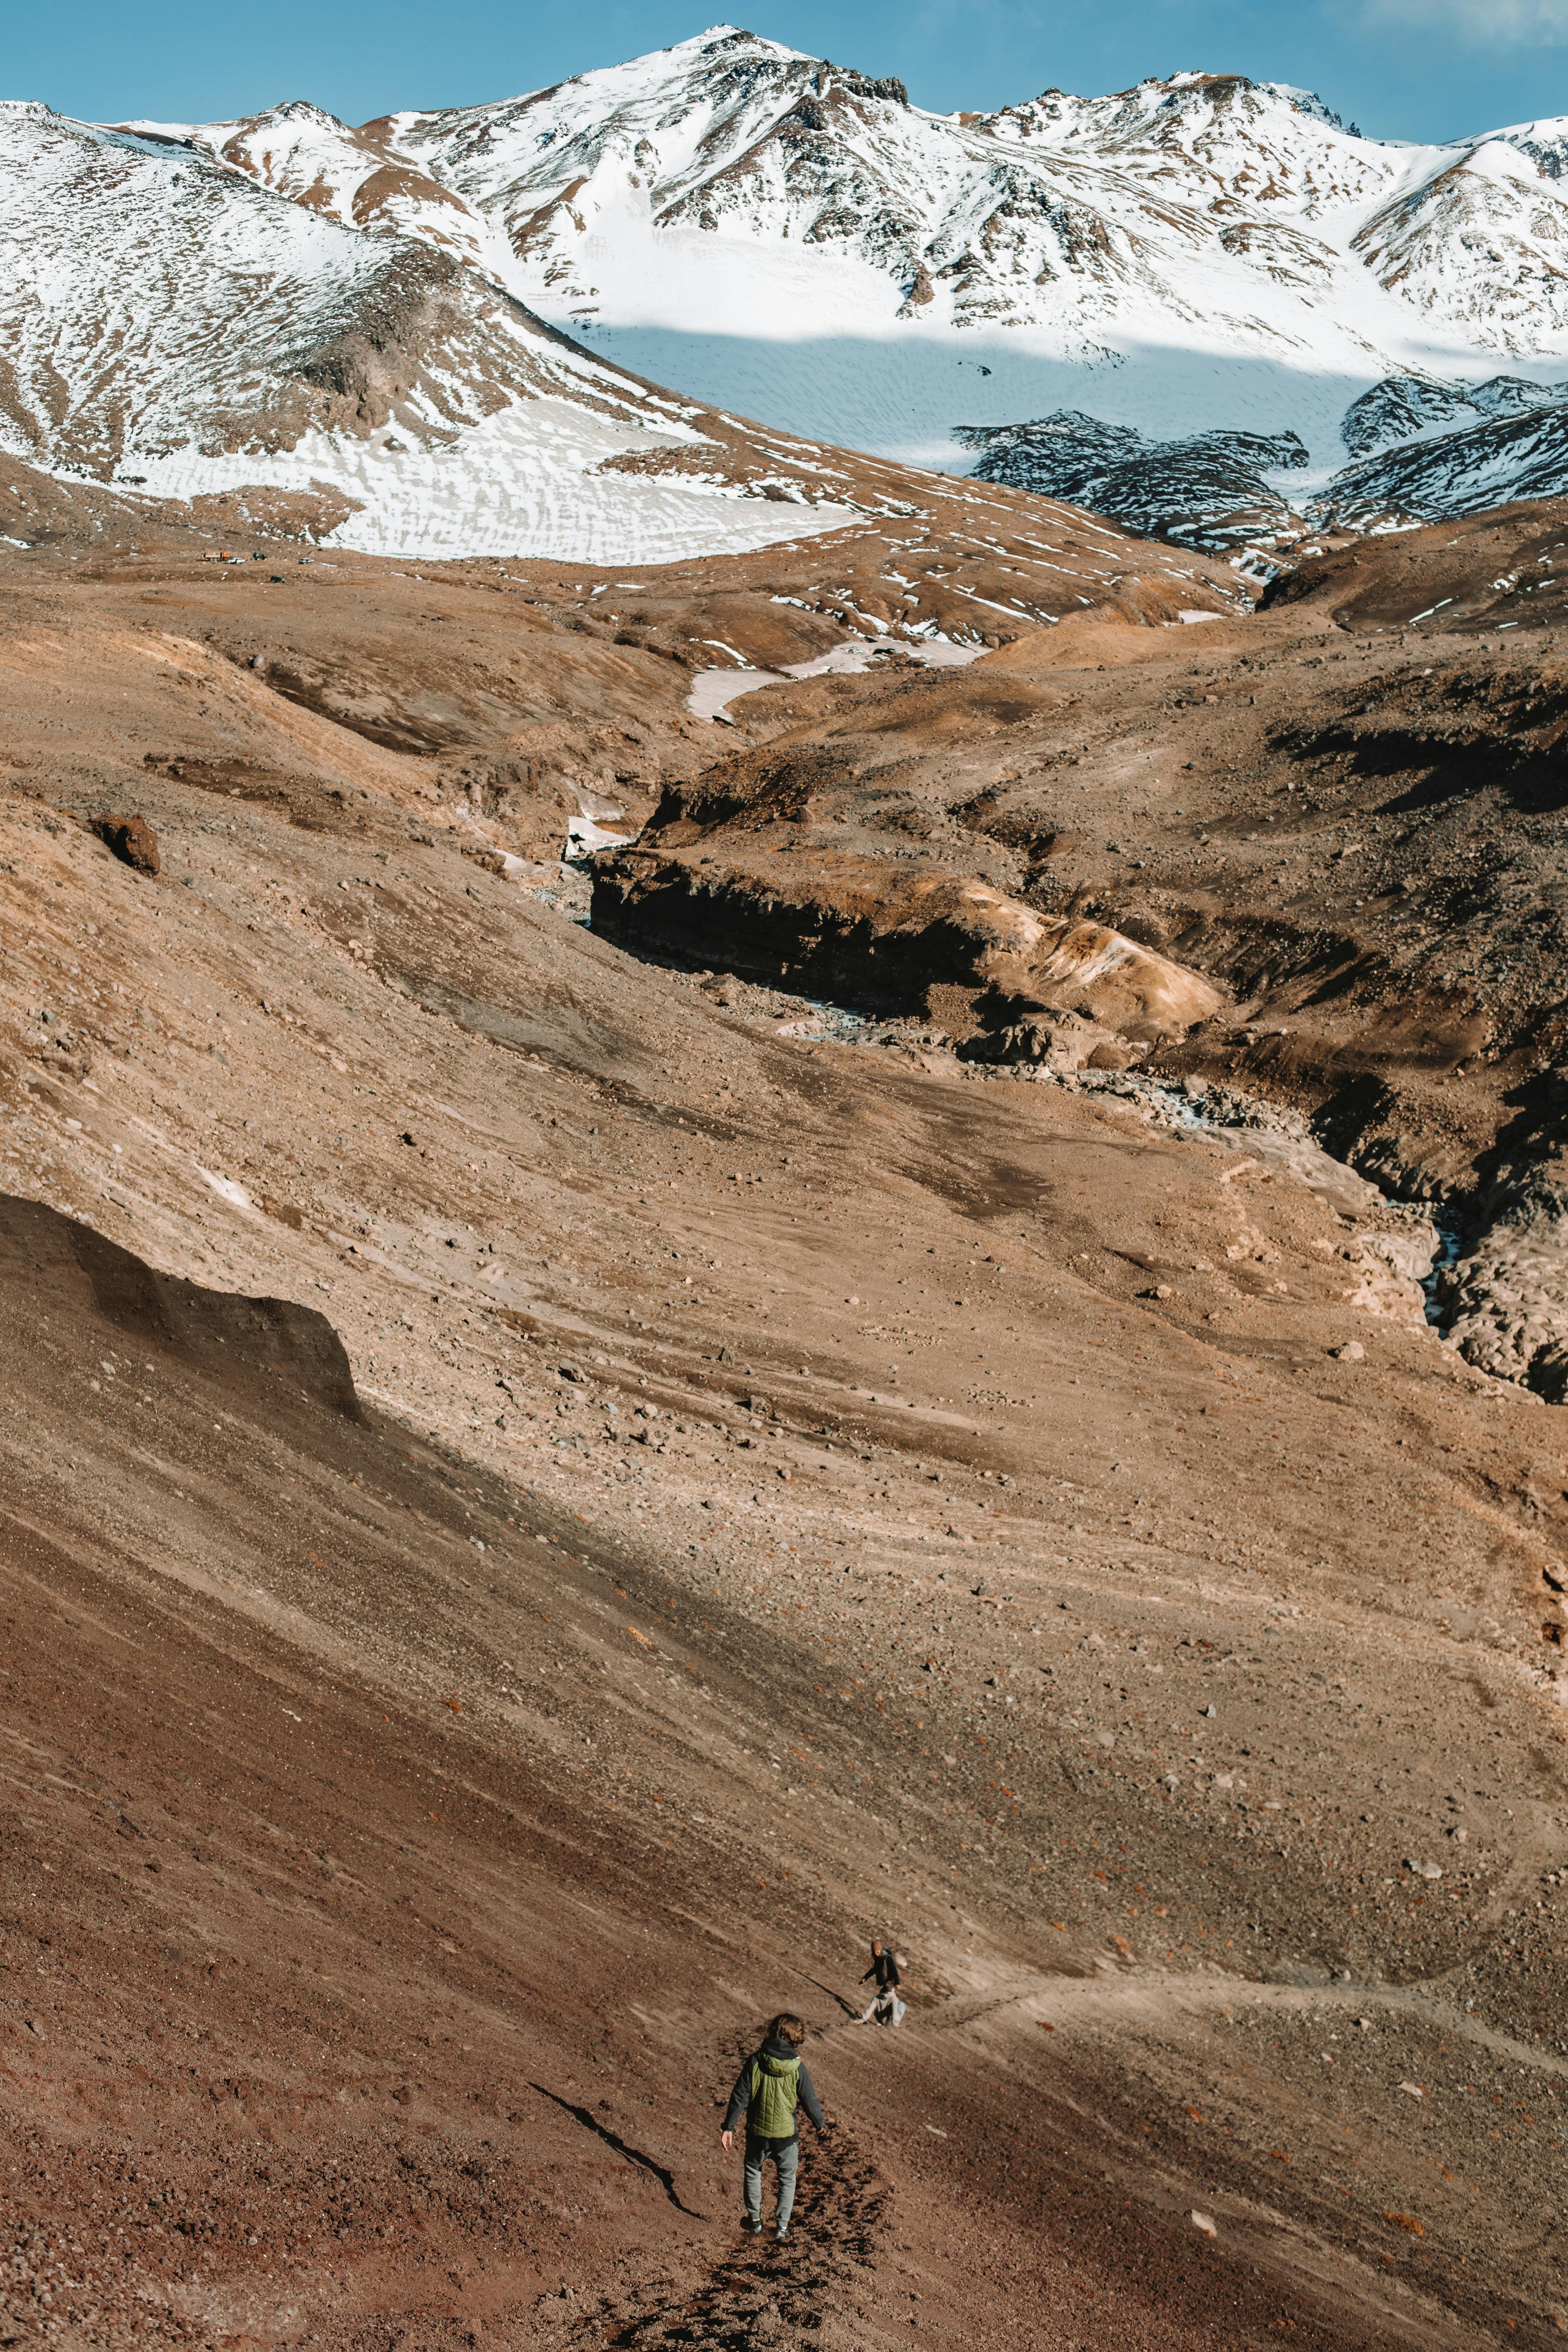
In 2025, camera gear is lighter and better than ever. You no longer need a huge bag of lenses to get great results. With a smart minimal setup and a few key accessories like a Camstrap camera strap, you can hike all day without feeling weighed down.
This guide shows you how to build a minimal hiking camera kit that fits in a small pack. It will work for long days and still deliver stunning landscape images.
Why a Minimal Hiking Camera Kit Gives You Maximum Freedom
A heavy bag full of gear may look “pro”, but it can ruin a long hike. A minimal kit keeps your load low and your mind clear. You spend more time watching the light and less time digging through your pack.
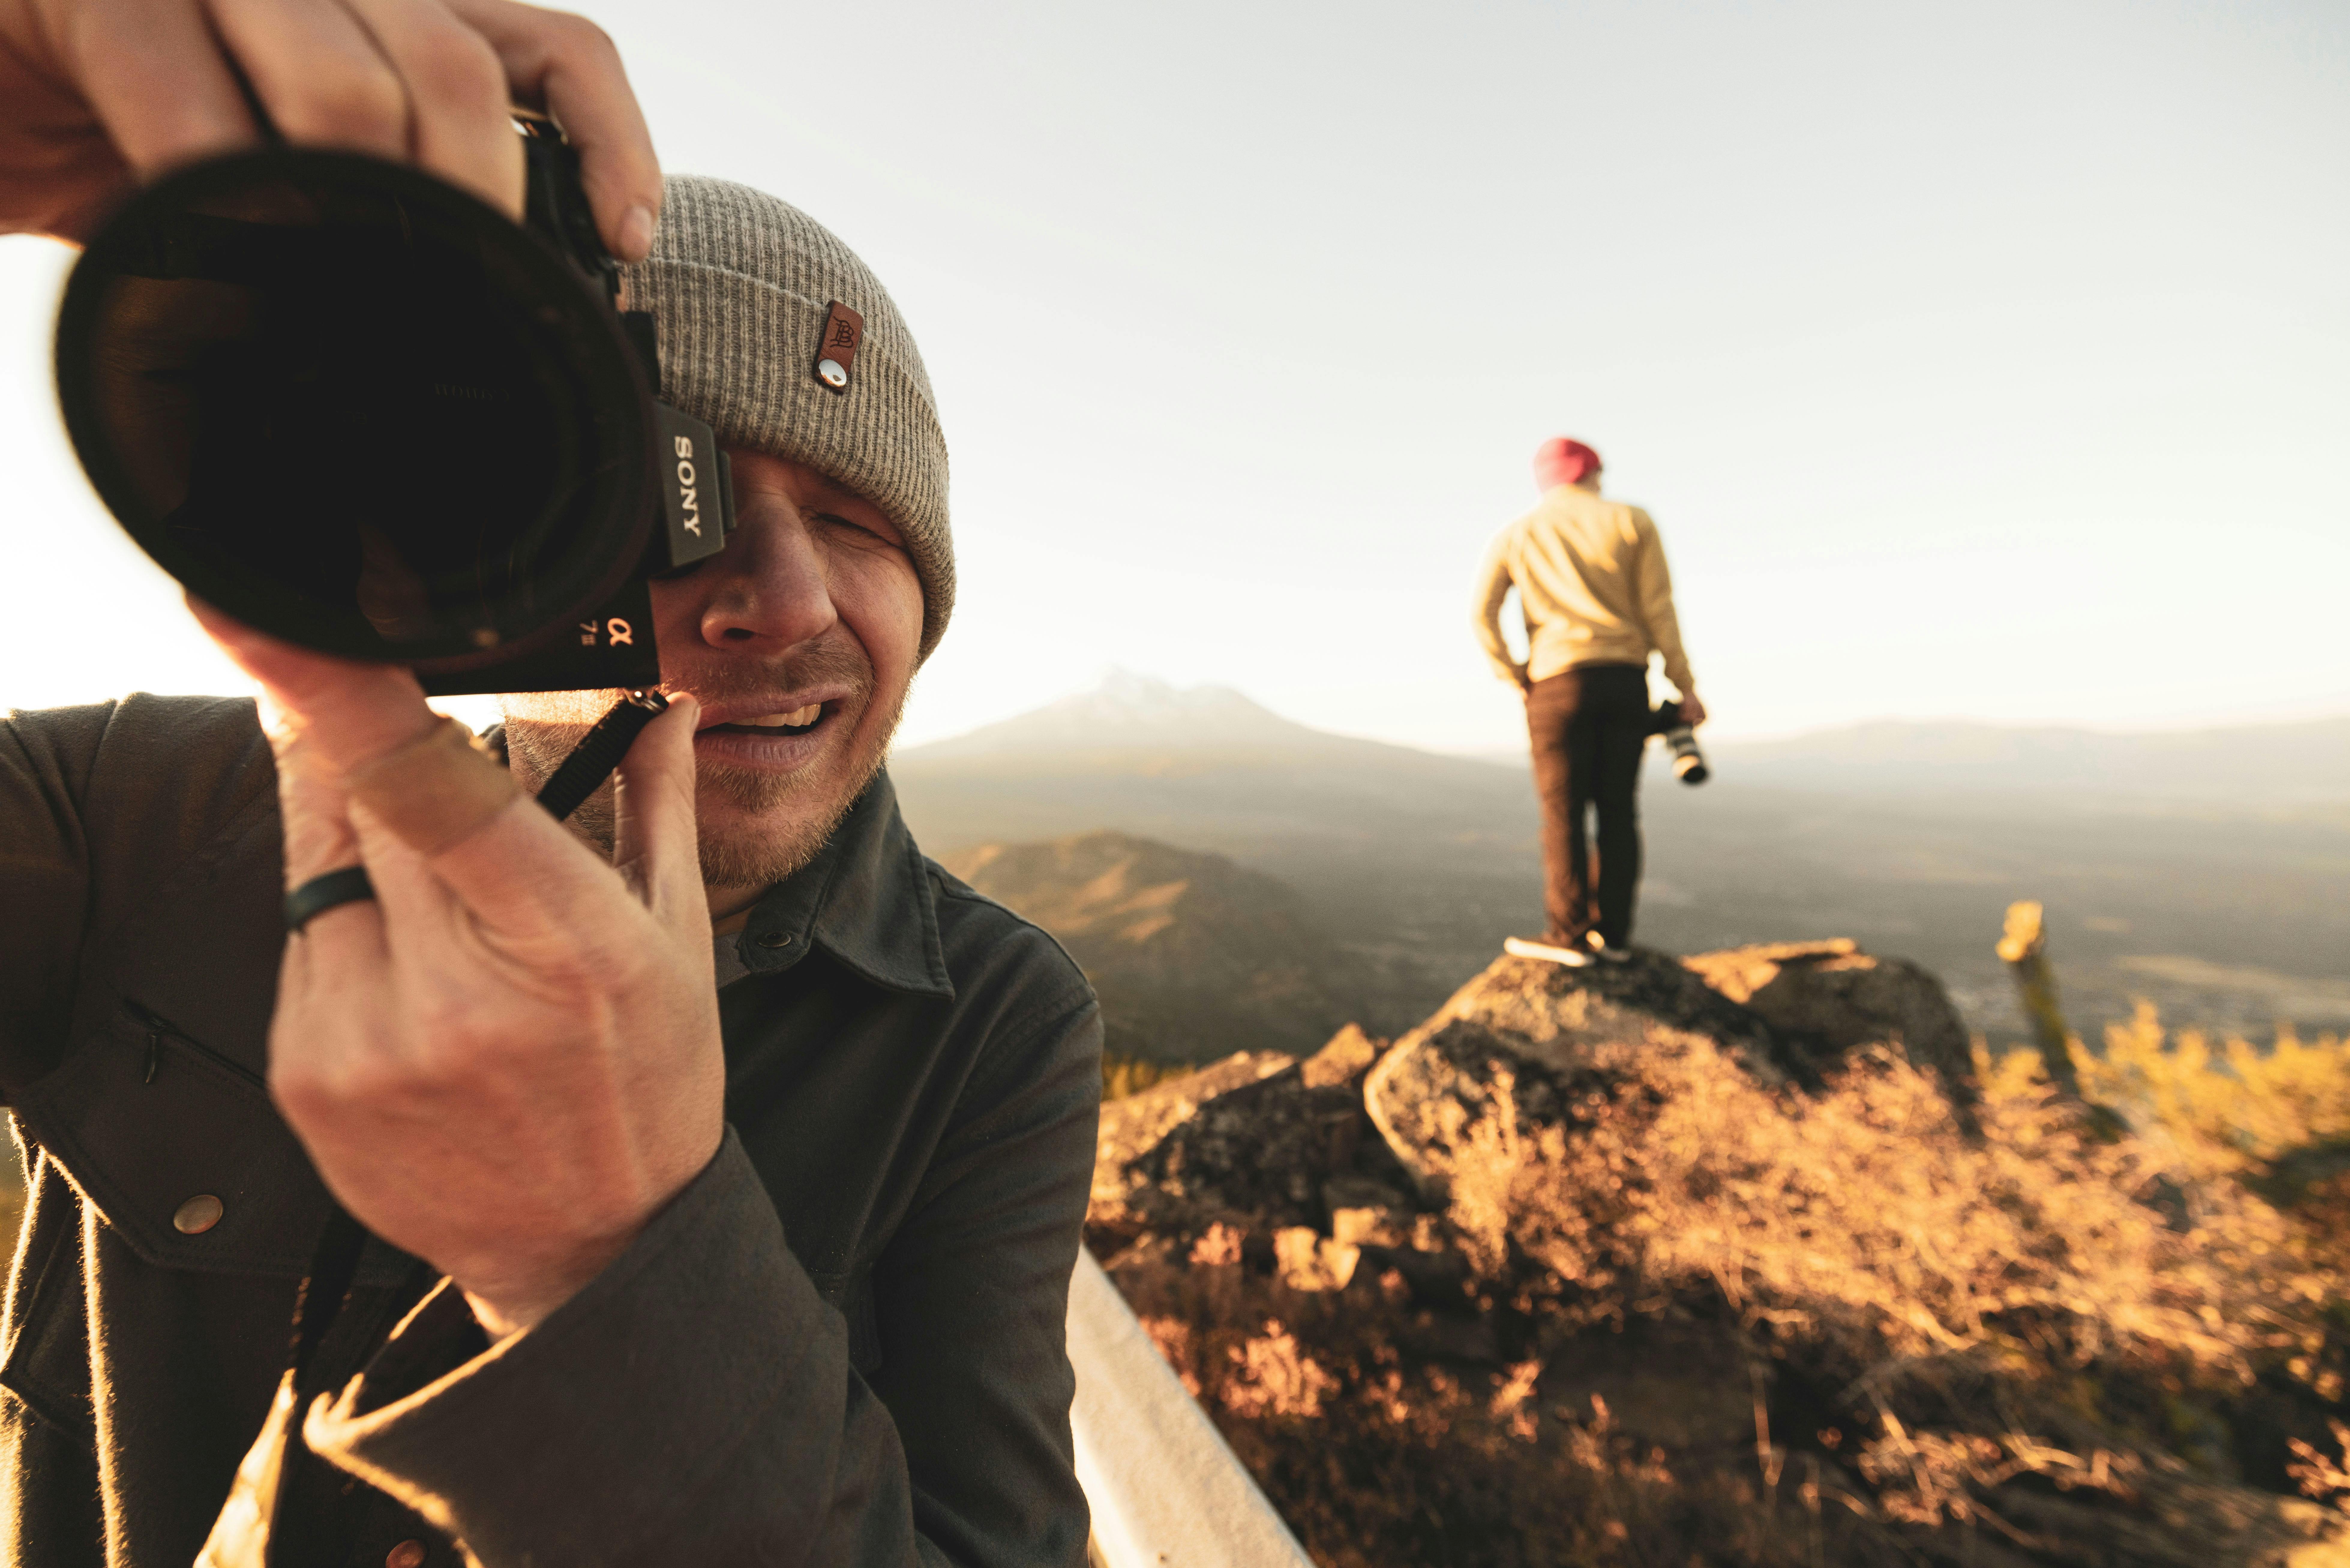
Travel and outdoor photographers keep saying the same thing: less is more. Many pros now hike with just one small body and one or two lenses. They get better photos because they move more, see more, and react faster to changing light.
The Real Cost of Heavy Gear on the Trail
Extra gear does more than slow you down. It also drains your energy and focus. On steep climbs, every extra kilo makes your heart work harder. After a few hours, this extra effort can make you skip that last ridge or sunset spot.
Heavy gear can also be a safety risk. A big pack throws off your balance on loose rock and narrow paths. When you feel tired, you are more likely to trip or twist an ankle. A minimal kit reduces that risk and helps you stay steady.
Minimal Gear, Maximum Creativity
Many landscape photographers notice they shoot better with fewer options. When you hike with one main lens, you stop asking “Which lens?” and start asking “Where is the best angle?”
This simple shift pushes you to move your feet and explore foregrounds. You start to work with the light instead of fighting your gear. Your style becomes more clear, and your photos feel more consistent. A minimal kit is not a limit. It is a tool that sharpens your eye.
Core Pieces of a Minimal 2025 Hiking Camera Kit
A minimal hiking kit does not mean “cheap” or “basic”. It means you choose each piece on purpose. You want low weight, strong weather sealing, and solid image quality. Here is a simple but powerful minimal base kit for 2025.
1. Camera Body: Light, Tough, and Simple to Use
For most hikers, an APS-C or small full-frame mirrorless body is the sweet spot. These cameras are much lighter than DSLRs and still give pro-level landscapes and large prints.
- Look for: weather sealing, good battery life, and a clear EVF
- Nice to have: in-body image stabilization (IBIS) for handheld shots at dusk
- Skip: huge cinema bodies or bulky grips unless you shoot heavy video
Models like the Sony a6700, Canon R50, Nikon Z50 II, or Panasonic S9 are good examples. They balance quality and size very well. If you already own a camera, use that first. The minimal mindset matters more than the exact brand.
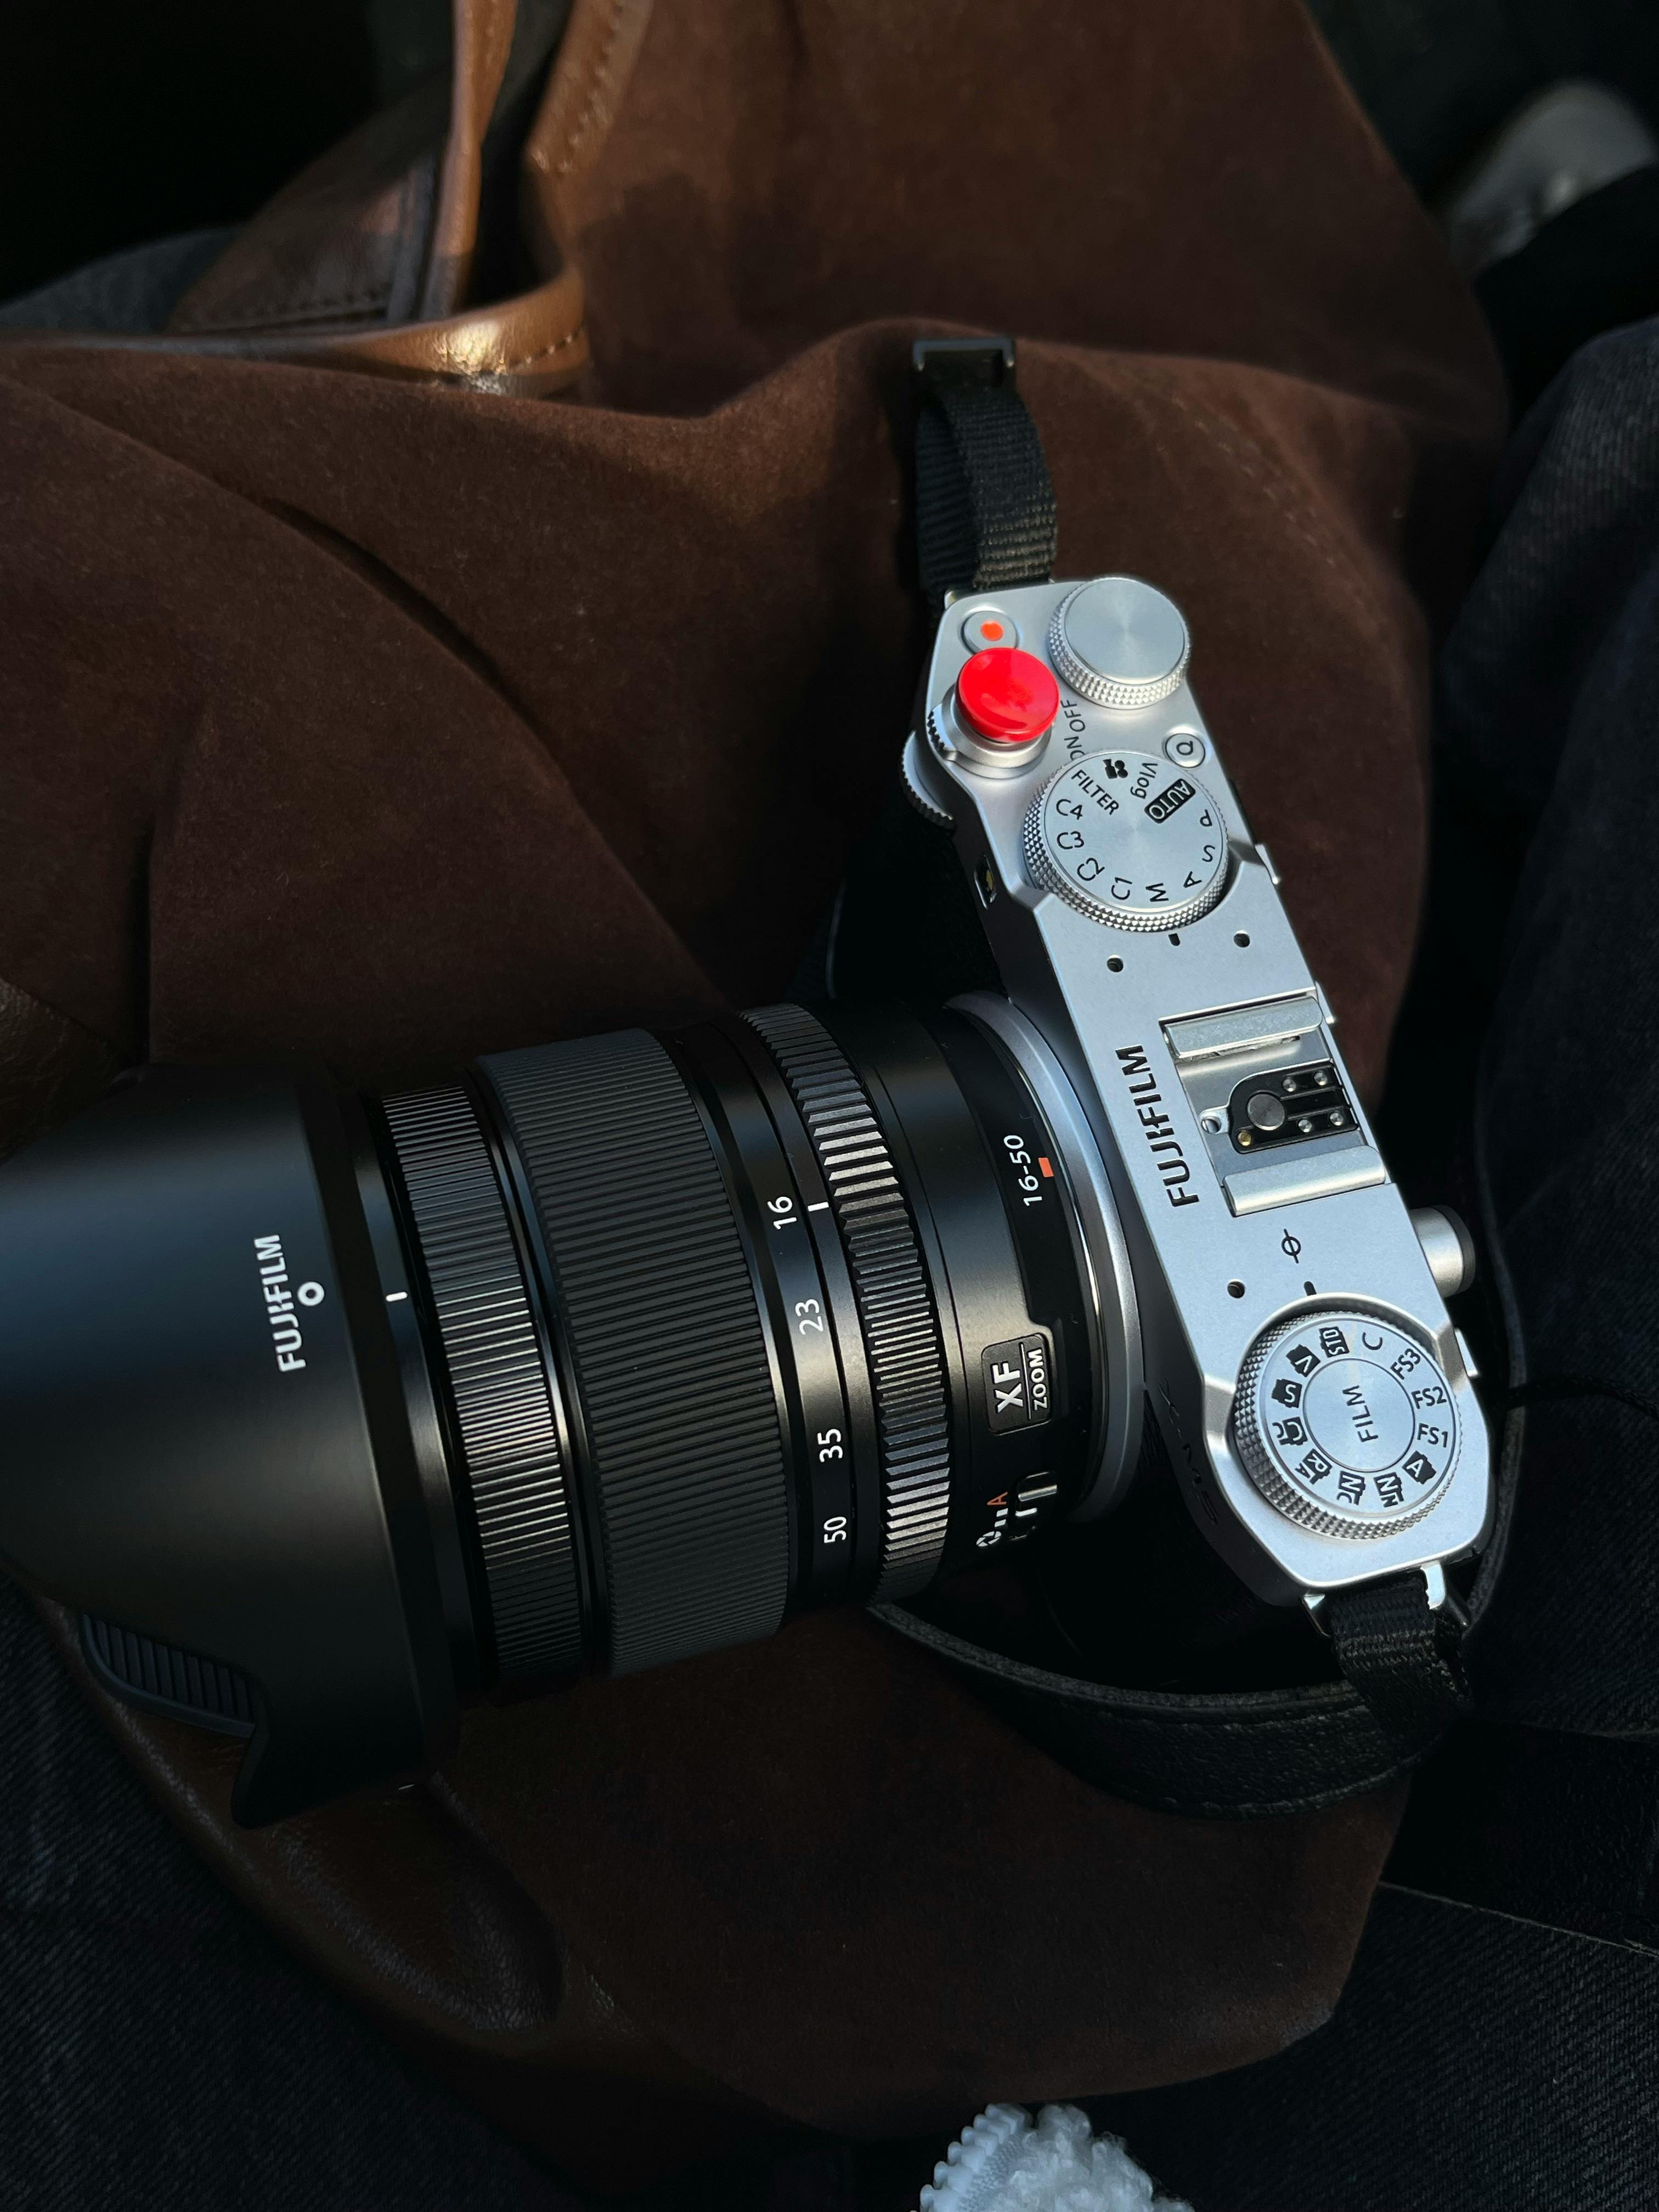
2. One Main Lens: The Heart of Your Minimal Kit
The lens you choose shapes your whole hiking style. To keep your kit minimal, start with just one main lens. You can always add a second later if you feel a real need.
For most landscape hikers, two choices work best:
-
Wide zoom (like 10–20mm APS-C or 16–35mm full-frame)
Great for big views, tight canyons, and dramatic skies. -
Standard zoom (like 16–50mm APS-C or 24–70mm full-frame)
Covers wide scenes and tighter details in one lens.
A wide zoom is ideal if you love huge mountains, lakes, and night skies. A standard zoom is better if you also shoot people, towns, and trail details. Both options fit a minimal kit as long as you keep it to one lens on most hikes.
3. Optional Second Lens: Only If It Solves a Real Problem
Some hikers add a small telephoto zoom, like a 55–210mm or 70–300mm. This helps when you want to compress distant peaks or catch wildlife from far away.
Before you buy, ask yourself:
- Do I often wish I could get closer to distant peaks or animals?
- Am I willing to carry this weight on every long hike?
If the answer is “sometimes” or “not sure”, leave it at home. A minimal kit is about what you use most of the time, not rare cases.
4. A Truly Lightweight Tripod
For sharp long exposures, blue hour, and night sky work, a tripod still helps a lot. Old metal tripods are often too heavy for a minimal hiking camera kit. In 2025, you can get strong, light carbon tripods that fold small.
- Weight target: about 1–1.3 kg (2.2–2.9 lb) for serious landscape work
- Height: tall enough that you do not always need to hunch
- Head: a simple ball head is fine for most hikers
If your hikes are short, you can go a bit heavier for more stability. For long multi-day trips, choose a tiny travel tripod and accept that very windy nights may be tough.
5. Filters: Minimal but Powerful Tools
You do not need a full filter pouch to shoot pro-level landscapes. Many pros now hike with only one or two key filters. This keeps their minimal kit light and simple.
- Circular polarizer (CPL) – cuts glare on water and wet rock. It deepens skies and boosts color. This is the one “must have” for many hikers.
- 1–3 stop ND or variable ND – helps you use longer shutter speeds for soft water in bright light.
Use step-up rings so one filter fits all your lenses. This classic minimal trick saves both weight and money.
6. Power and Storage: Just Enough, Not Too Much
A minimal kit still needs enough power and memory to last a full day. It should also support a few days on trail if you camp.
- Carry 2–3 camera batteries for mirrorless bodies.
- Bring one small power bank (10,000–15,000 mAh) if you sleep outdoors.
- Use 2–3 fast SD cards instead of one huge card. Swap daily so you do not lose all your work if a card fails.
Store spare cards in a tiny hard case, not loose in your pack. This keeps them safe from dust, water, and drops.
Carrying Your Minimal Kit: Straps and Bags That Keep You Moving
A minimal kit is not just about the camera and lens. How you carry the kit matters just as much. If your camera sits deep in your pack, you will miss shots. If your strap digs into your neck, you will leave the camera behind.
This is where smart straps and bags, like those from Camstrap, can change your whole hiking experience. They help you keep a minimal kit ready at all times.
Why Your Strap Choice Matters on the Trail
On steep or rocky ground, you need your hands free and your balance steady. A basic neck strap lets the camera swing and hit rocks. It also pulls on your neck and shoulders over time.
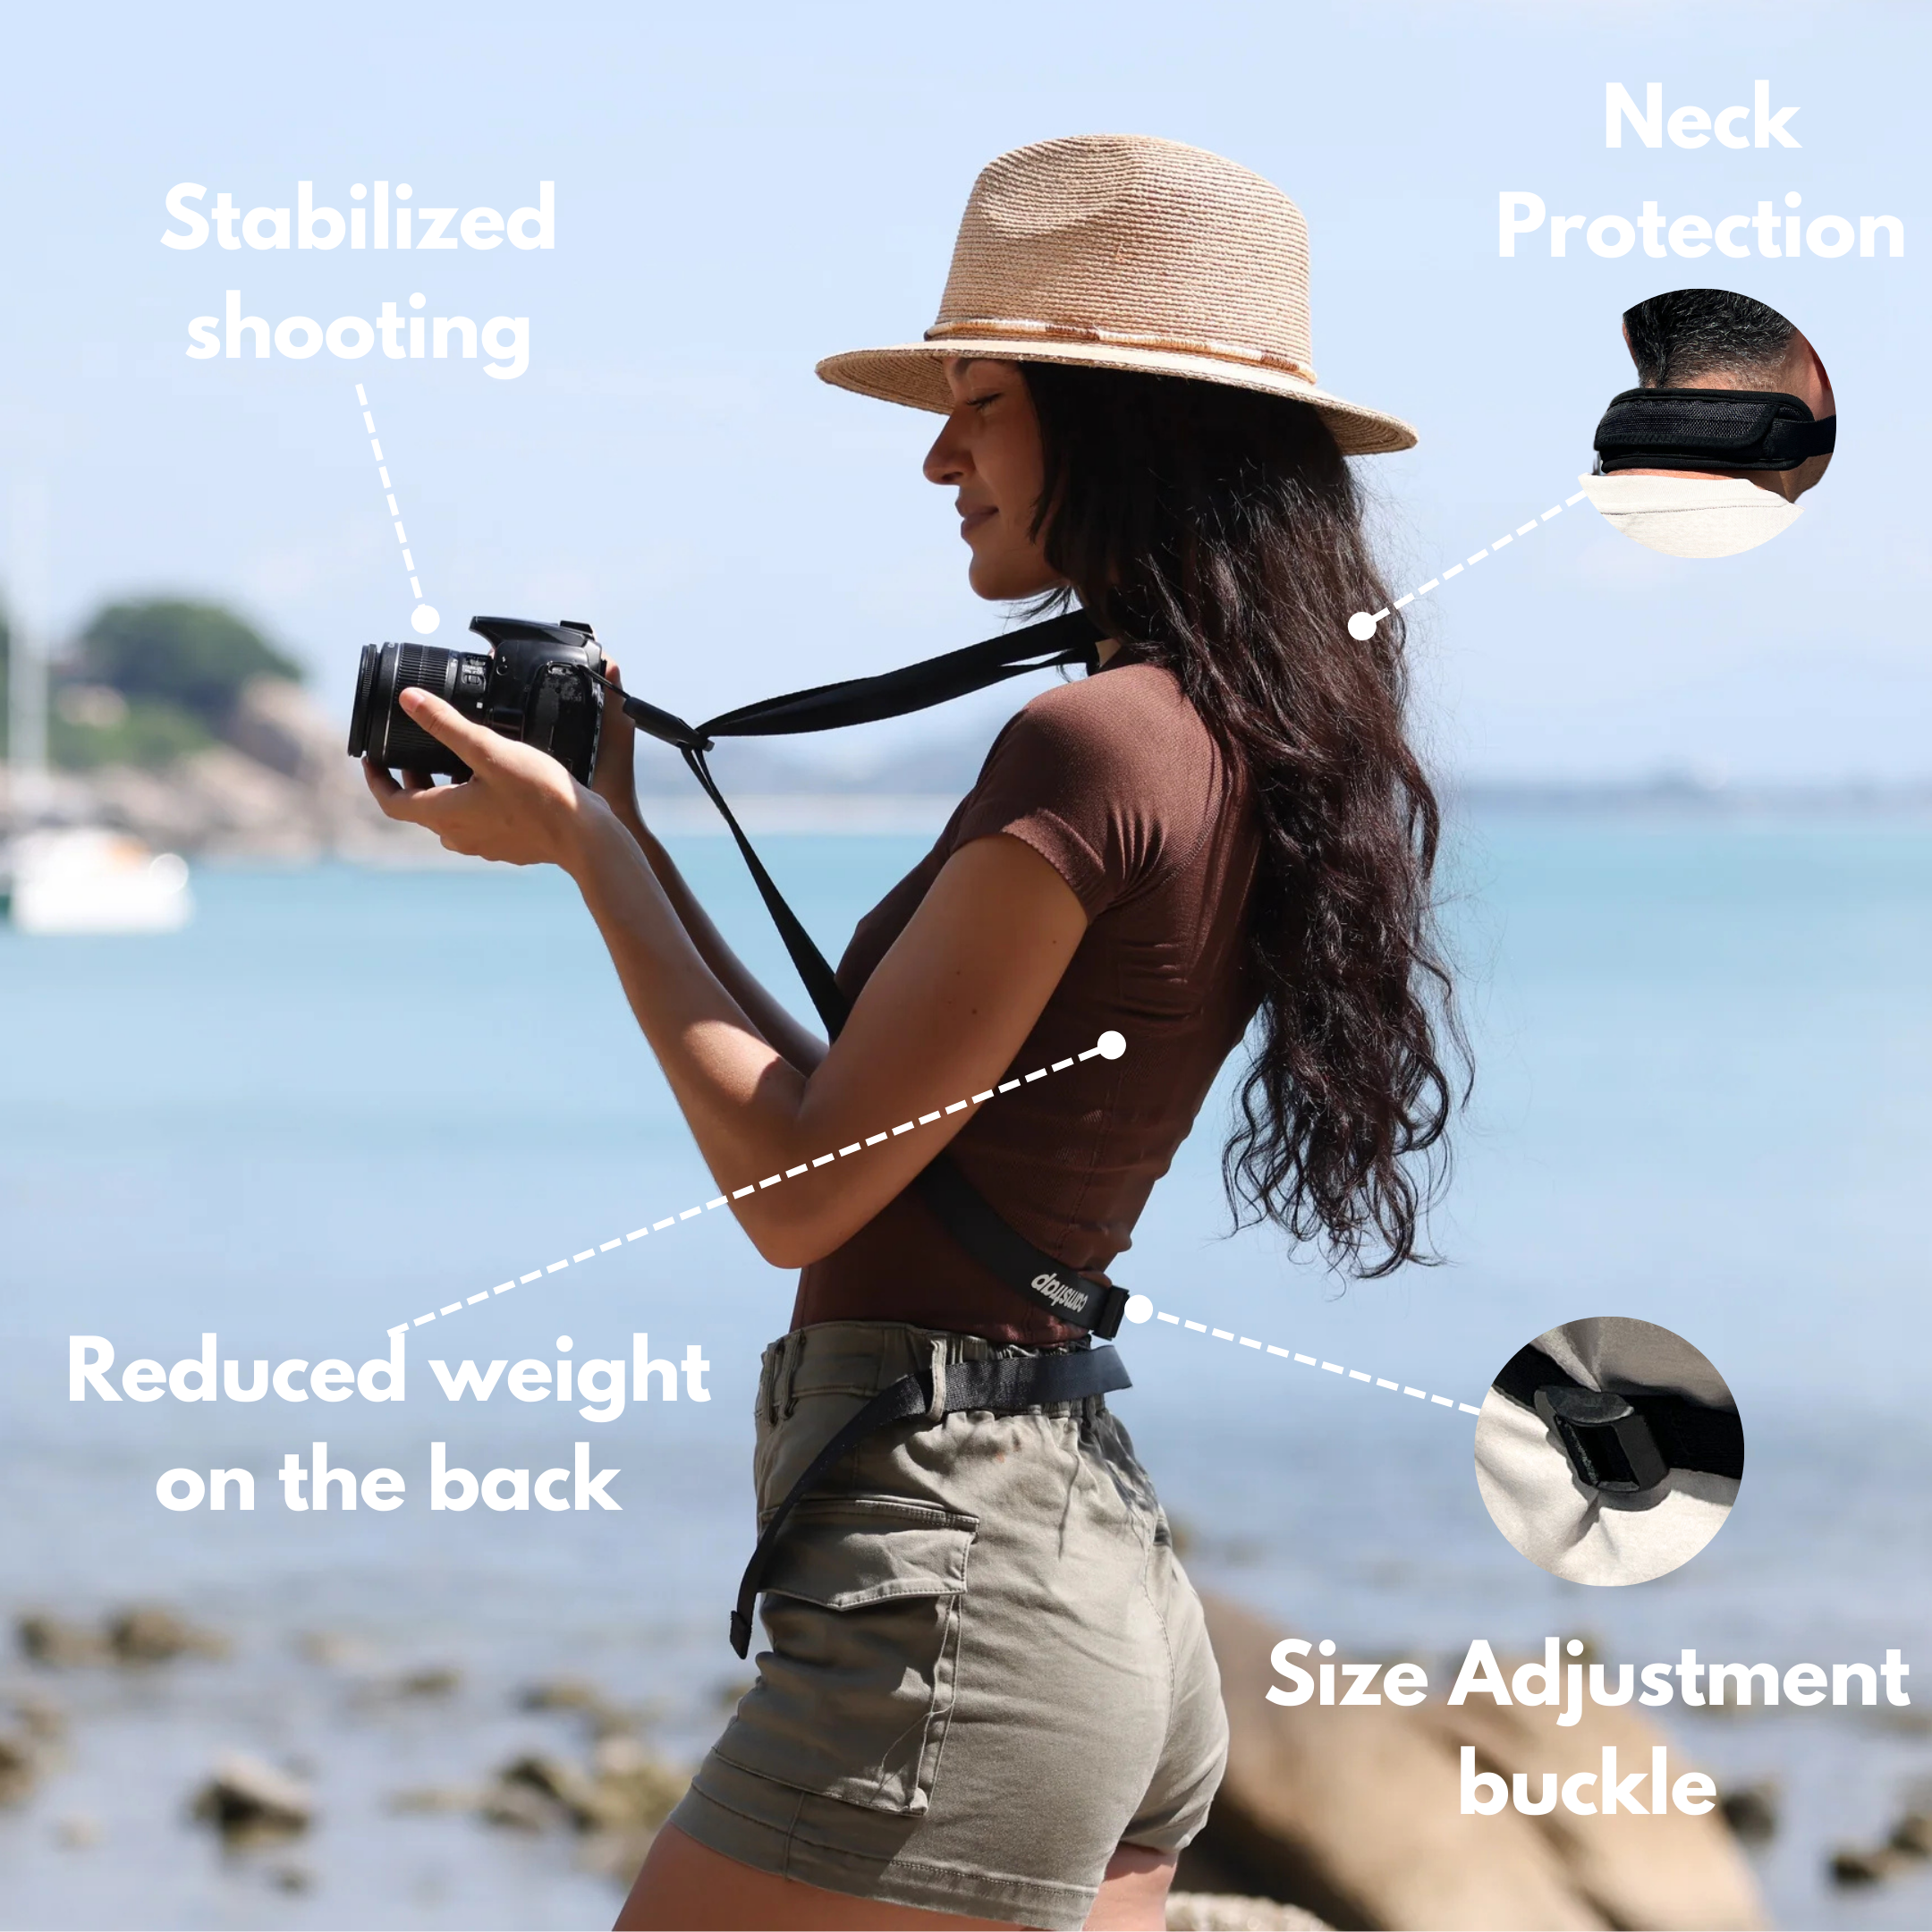
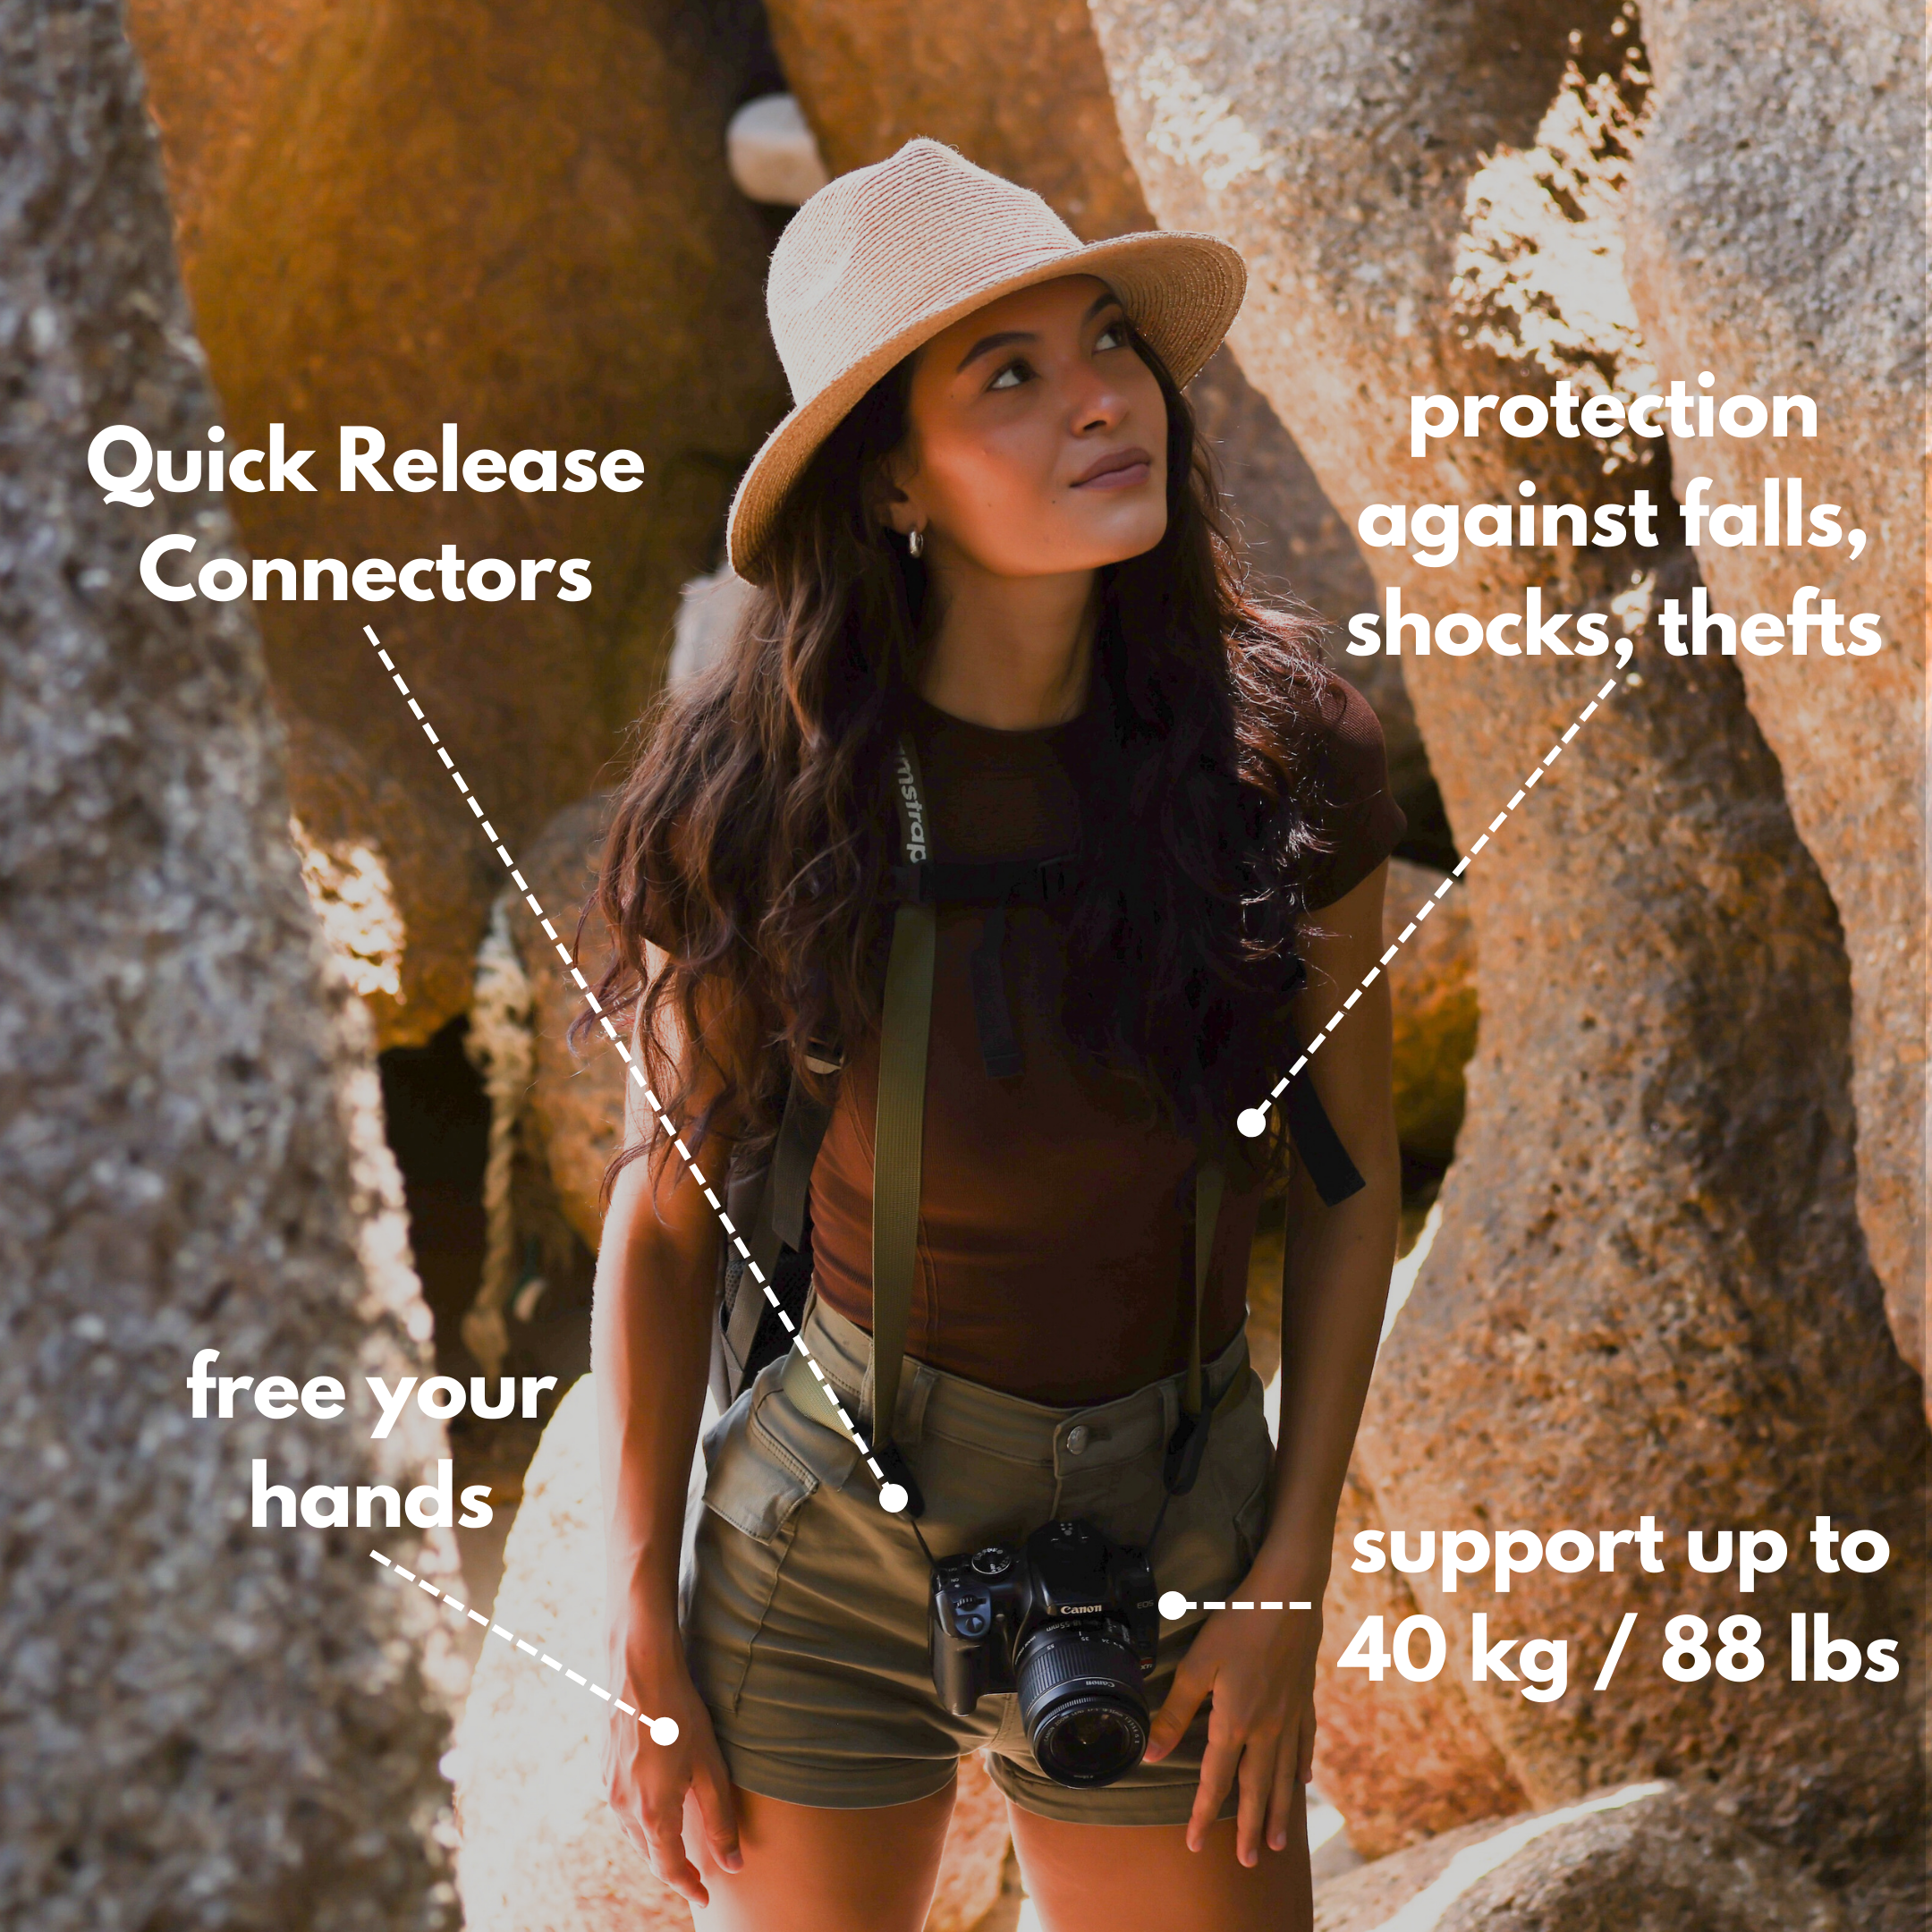
A good hiking strap should:
- Spread weight across your shoulder or chest
- Hold the camera close to your body so it does not swing
- Adjust quickly over a jacket or pack straps
This is the problem Camstrap set out to solve with their minimal but strong strap designs. Each strap is assembled with care in France and built for real outdoor use.
Choosing the Right Camstrap for Your Style
Camstrap offers several straps that fit a minimal hiking camera kit very well. Each one is light but tough, with clean design and strong stitching.
- Camstrap Voyager – Great for travel enthusiasts who move between cities and trails. It balances comfort and style and works well with compact mirrorless bodies.
- Camstrap Explorer – Built for outdoor adventure photographers who carry a DSLR or heavier setup. The padding and width help spread weight on long days.
- Camstrap Nomad – Ideal for amateur photographers who want one strap for everyday use and weekend hikes. It is simple, minimal, and very easy to adjust.
- Camstrap MagClip – Adds a smart magnetic clip system so you can attach or release your camera in seconds. This is perfect when you swap between tripod and handheld often.
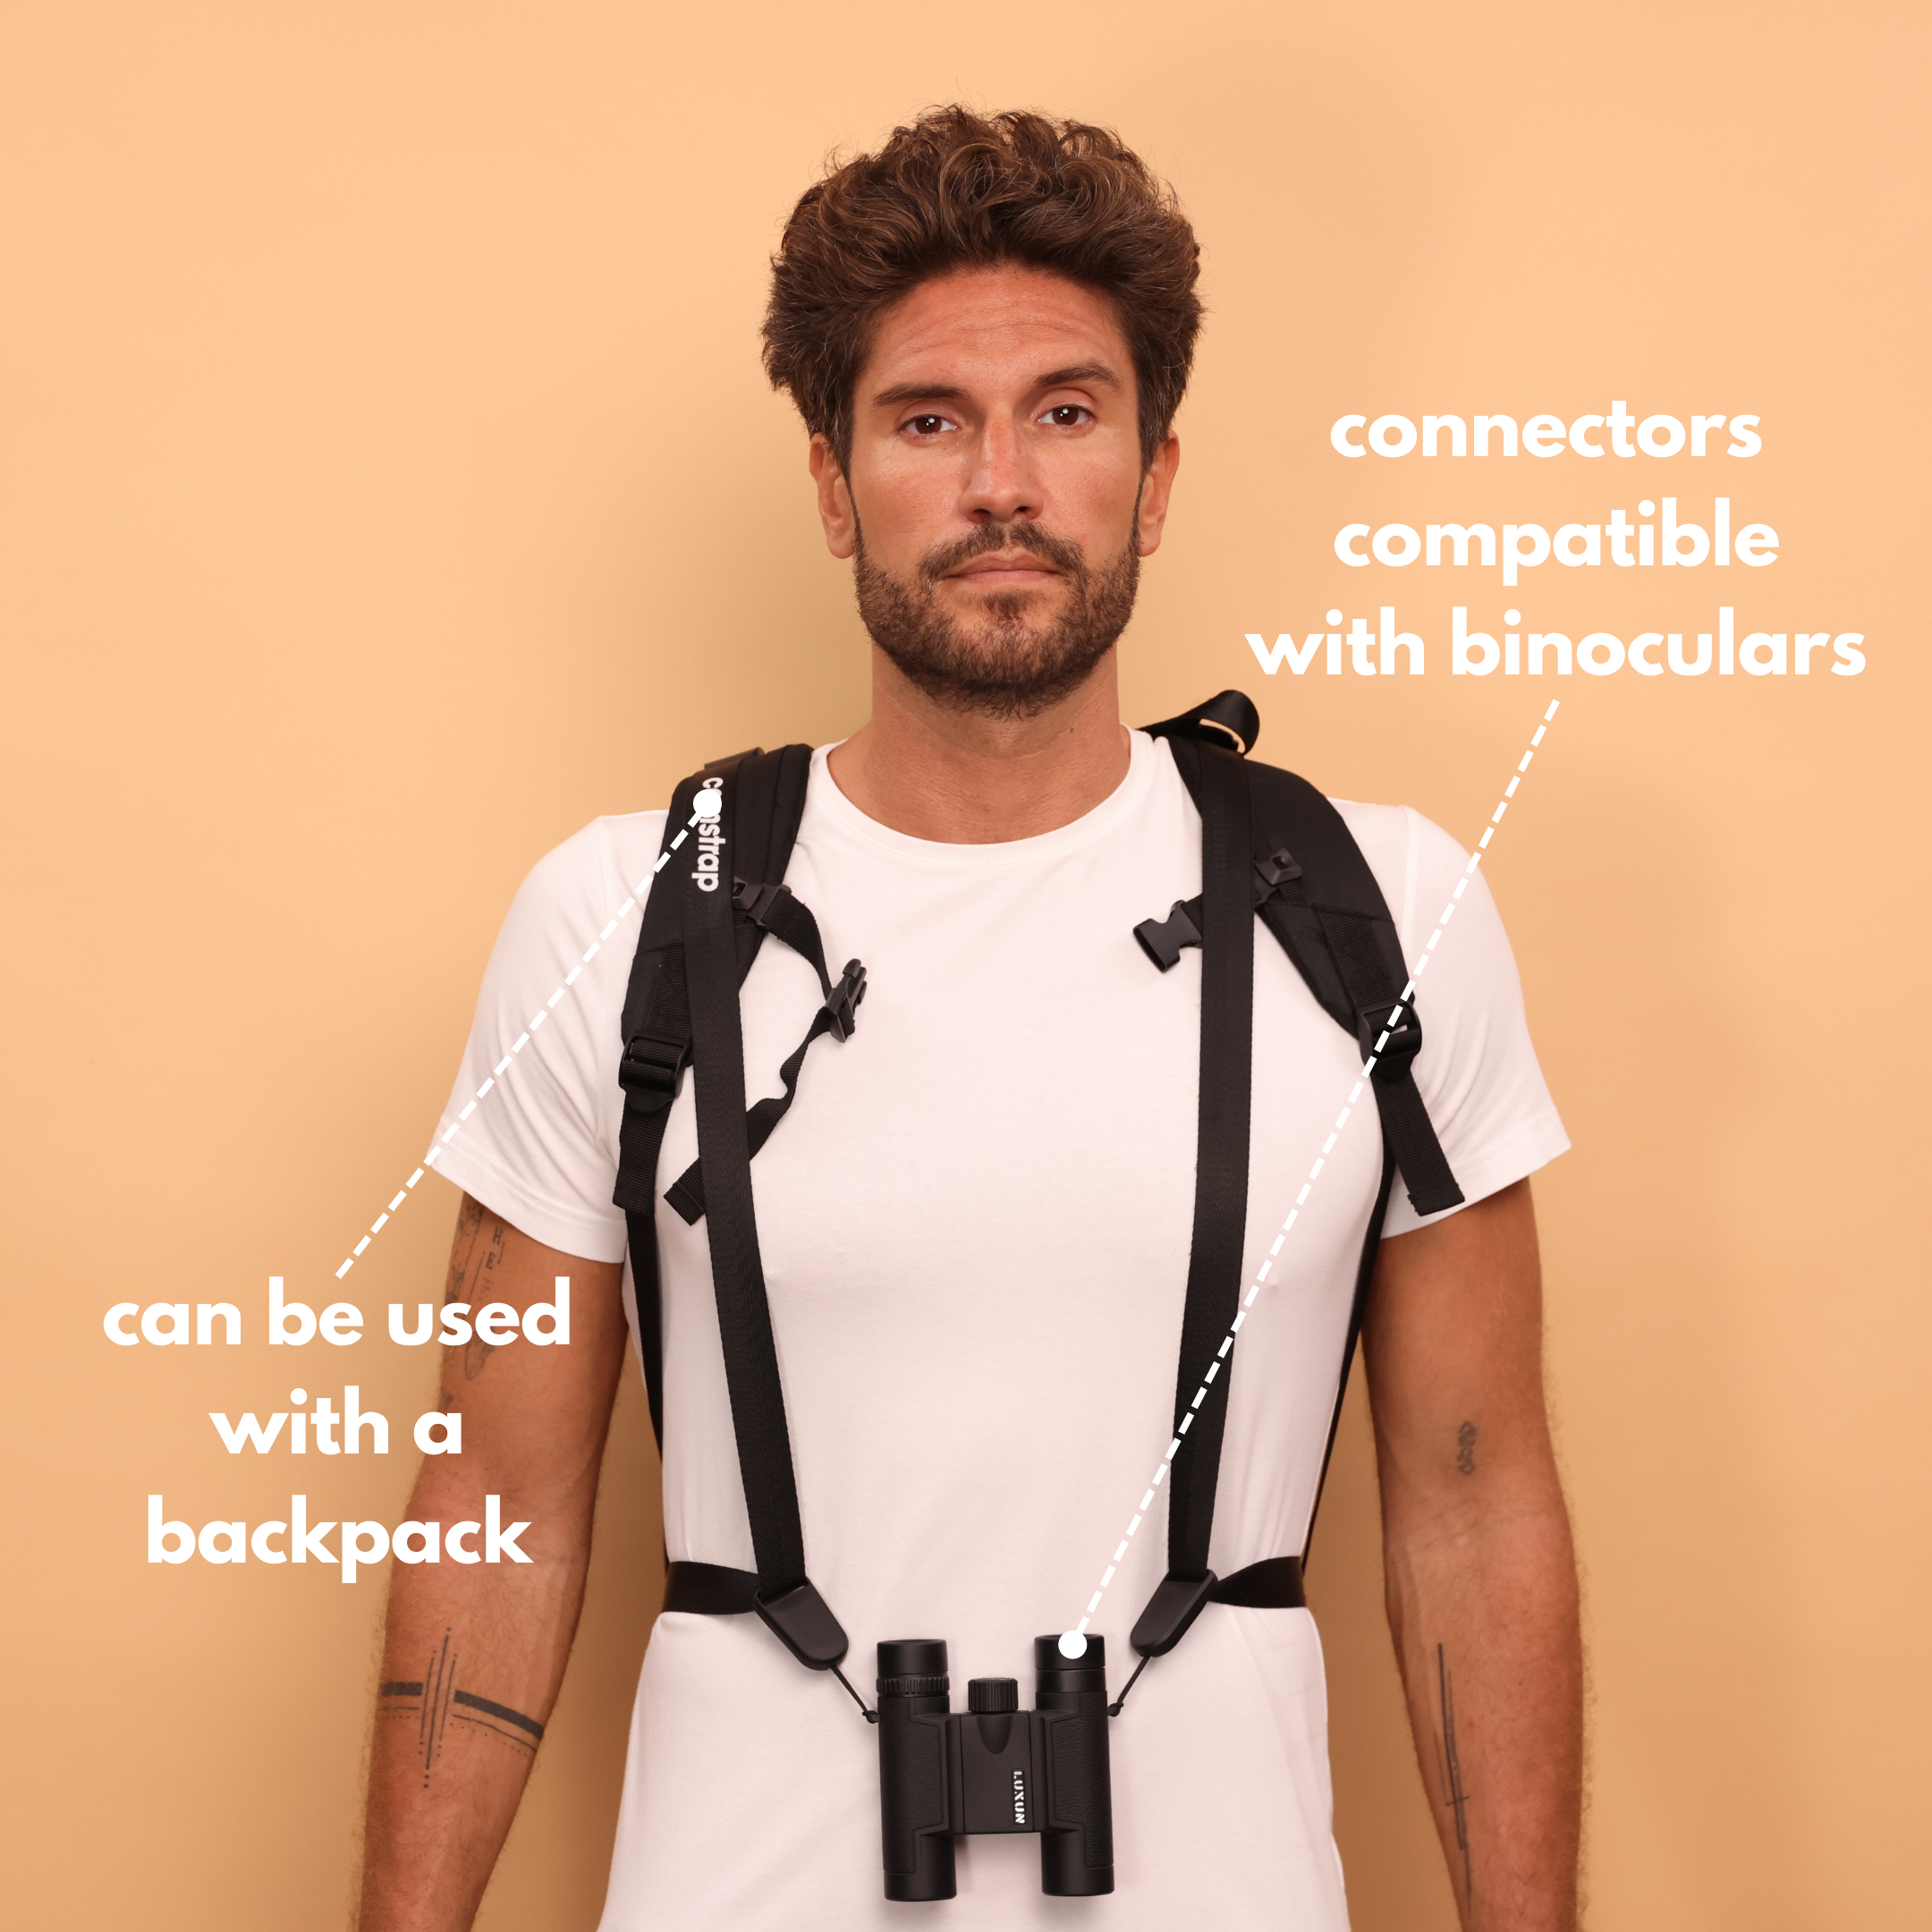
All of these straps sit well over backpack shoulder straps. This avoids the “strap tangle” that makes many people hate carrying a camera while hiking. It keeps your minimal kit neat and ready.
Backpack and Access: Keep the Camera Ready
A minimal kit should stay easy to reach at all times. If you always have to stop, drop your pack, and dig, you will shoot less. Instead, aim for “one move access”.
- Use a strap, like a Camstrap Voyager or Explorer, to keep the camera on your chest or hip.
- Pair it with a small hiking pack, 20–30 liters, with a simple inner cube or padded insert.
- Keep your tripod on the side or back with quick-release straps.
For longer trips, you can add a light camera cube inside a bigger pack. However, the camera body should still ride on your strap, not inside the cube, when you are actually hiking.

Three Minimal Hiking Camera Setups for Different Photographers
Now let’s match this minimal approach to three common types of hikers. These are travel enthusiasts, outdoor adventure photographers, and amateur photographers.
1. Travel Enthusiasts: One Small Kit for Planes, Trains, and Trails
Travel lovers need a kit that moves easily from airports to mountain paths. Space in the carry-on is tight, and security checks can be stressful. A minimal camera kit keeps things smooth and simple.
Suggested setup:
- Compact APS-C or full-frame mirrorless body
- One standard zoom (like 16–50mm APS-C or 24–70mm full-frame)
- Circular polarizer with step-up ring
- Small carbon travel tripod
- 2–3 batteries and 2 SD cards
- Camstrap Voyager for all-day comfort and stylish city use
This kit fits in a single personal-item backpack with room for clothes and a laptop. Because Camstrap ships internationally with tracking and offers secure payment, it is easy to get a Voyager strap before your next big trip. This helps you keep your minimal kit ready, even if you live far from major camera stores.
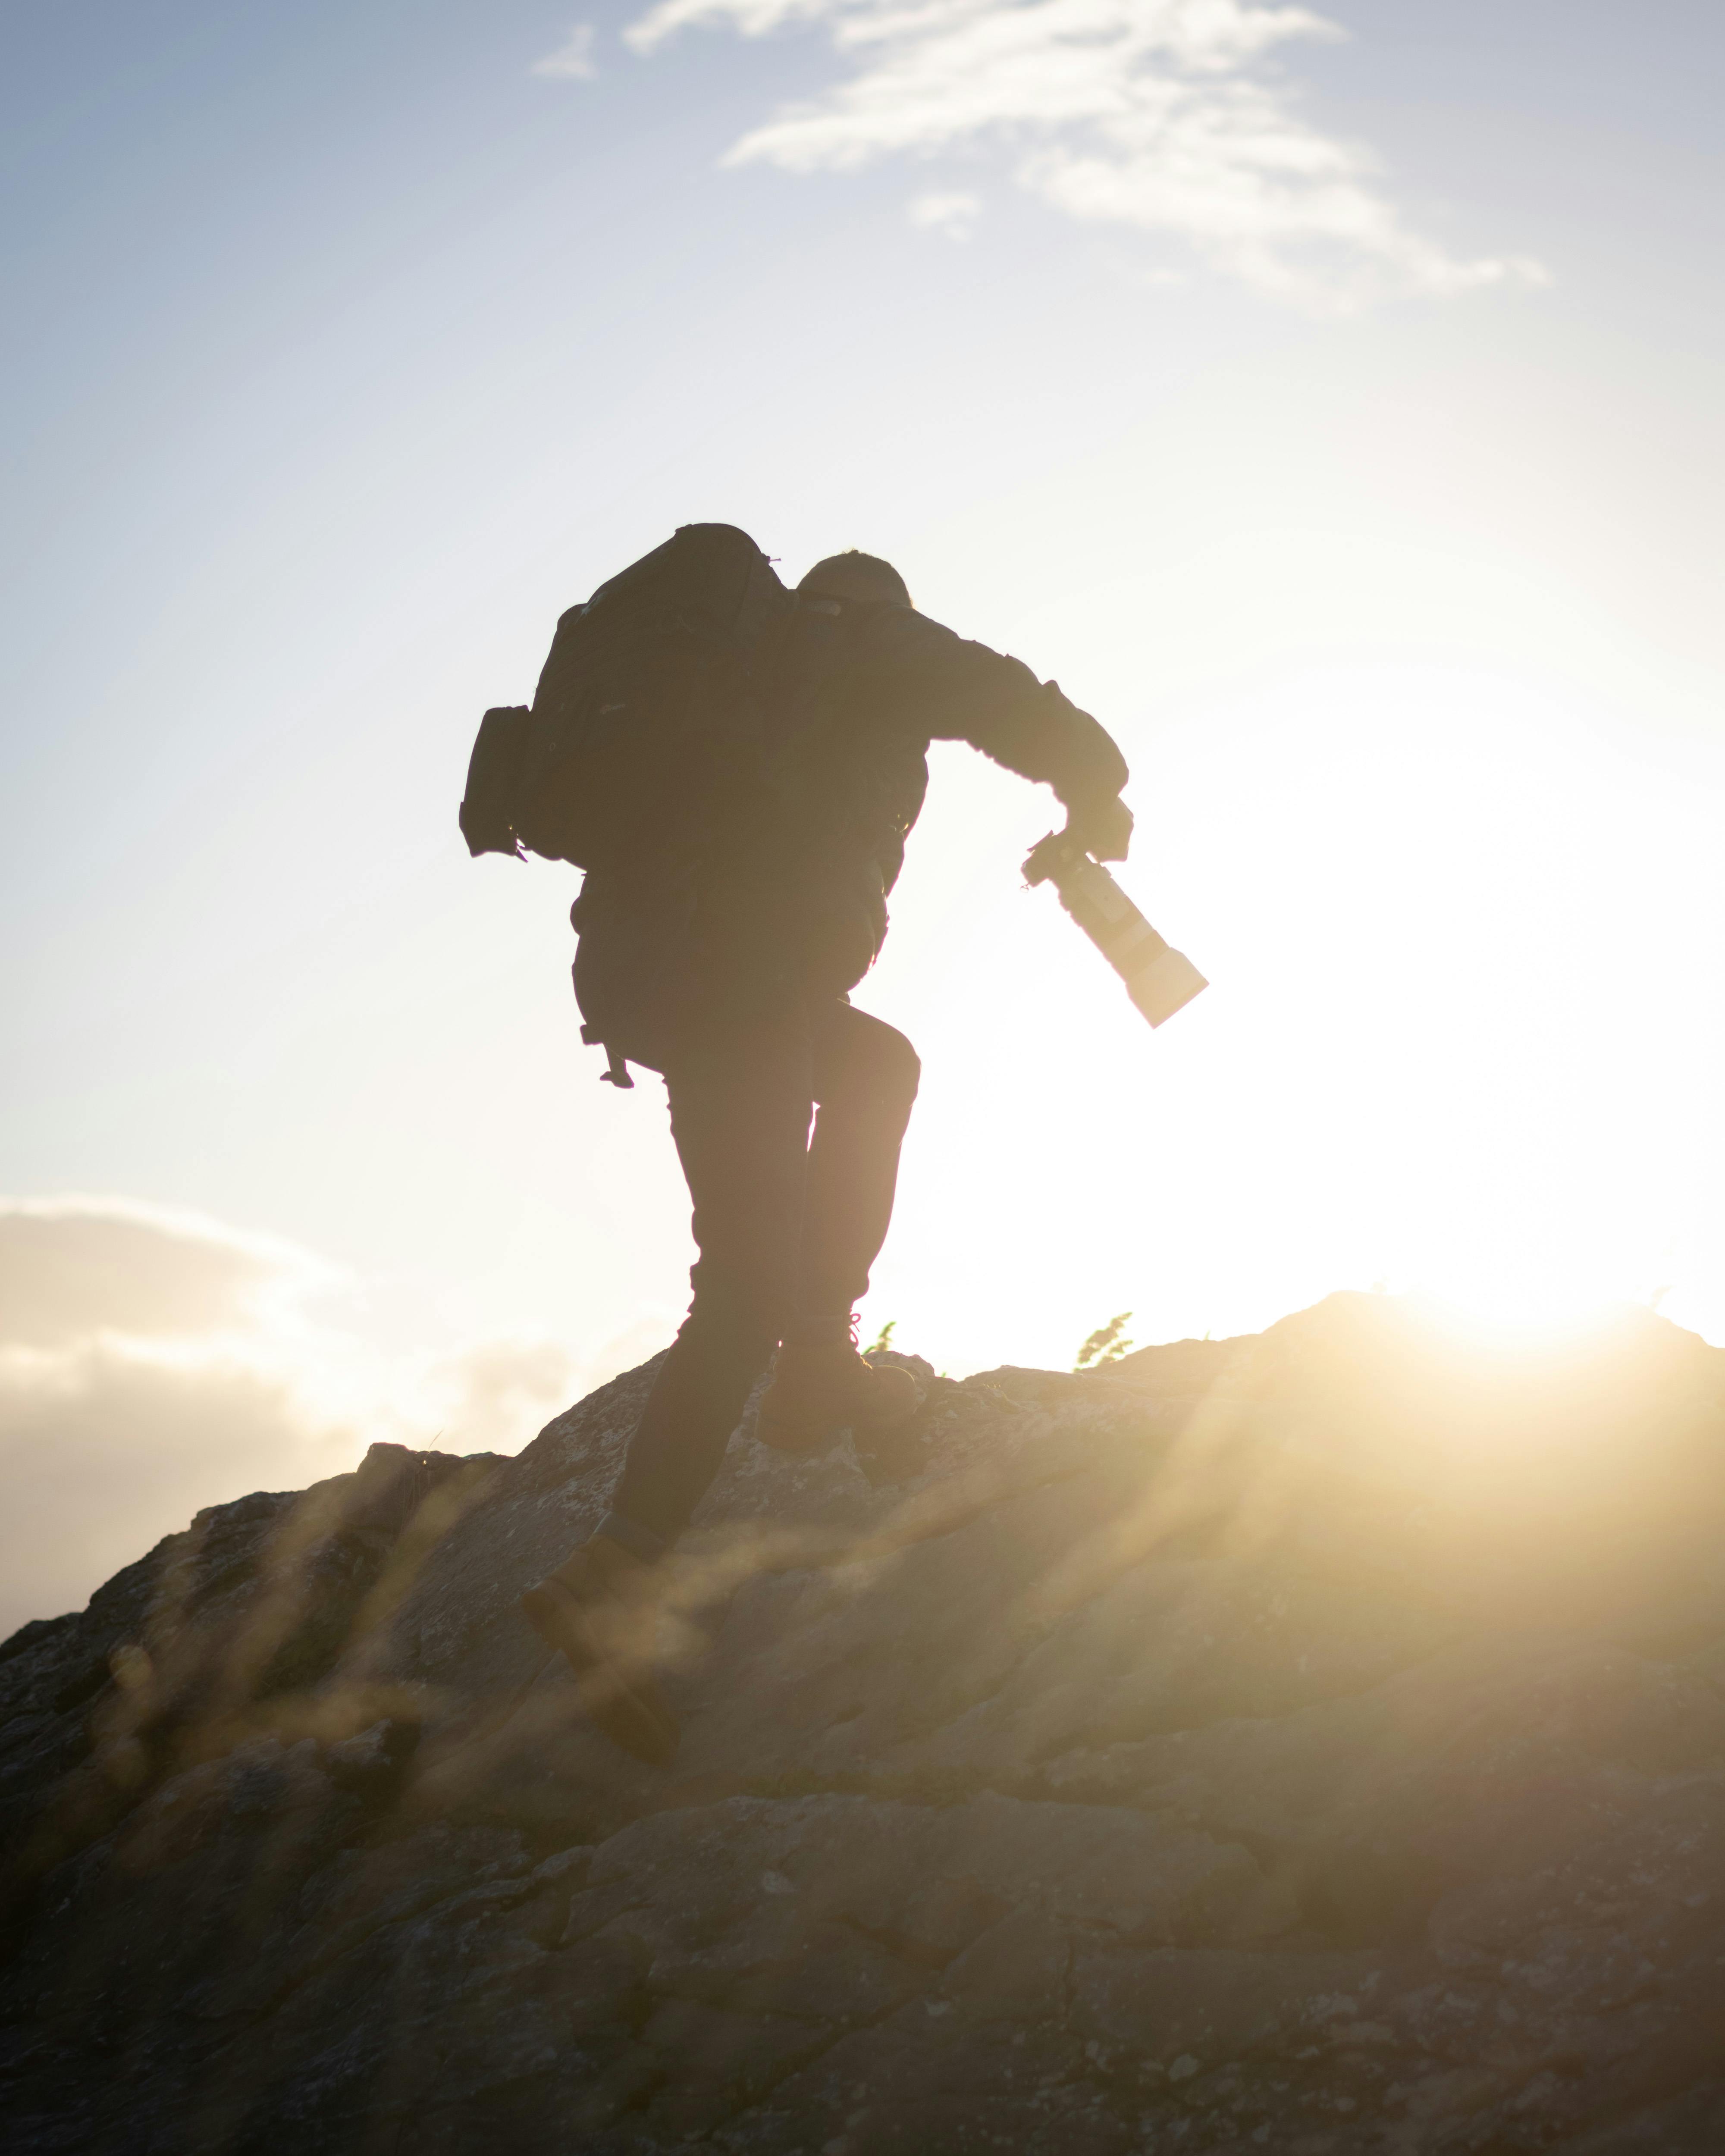
2. Outdoor Adventure Photographers: Rugged but Still Minimal
Outdoor adventure shooters face rough weather, long climbs, and sometimes snow or sea spray. They need gear that can take a hit but still stay as light as possible. A minimal kit helps them move fast and stay safe.
Suggested setup:
- Weather-sealed APS-C or full-frame body with IBIS
- Wide zoom (10–20mm APS-C or 16–35mm full-frame)
- Optional small telephoto zoom if you shoot wildlife
- CPL and 3-stop ND filter
- Strong carbon tripod with hook to hang your pack for extra stability
- 3–4 batteries and a rugged SD card case
- Camstrap Explorer for padded support with heavier setups
- Camstrap MagClip if you often clip in and out while on steep ground
The Explorer strap keeps a big camera stable against your chest, even when you scramble or move through brush. Because Camstrap offers a 30-day money-back guarantee, you can test how it feels with your full load. You can return it if it does not fit your body well.
3. Amateur Photographers: Affordable, Fun, and Truly Minimal
Hobby shooters want a simple, low-stress kit that helps them learn. They may use an entry-level camera and look for good deals. A minimal camera kit is perfect here because it keeps both costs and weight down.
Suggested setup:
- Entry-level mirrorless or compact camera
- One kit zoom (like 15–45mm or 18–55mm)
- No tripod at first – focus on handheld skills
- One extra battery and one backup SD card
- Camstrap Nomad for a light, stylish strap that costs less than most heavy harnesses
As skills grow, amateurs can add a small prime lens, like a 35mm or 50mm, for low light. This also helps create soft background blur. The minimal base stays the same. You just swap lenses based on the hike.
Practical Tips to Get Pro-Level Landscapes With Minimal Gear
Even the best minimal kit will not help if you use it poorly. The good news is that strong landscape photos come more from technique than from gear. These simple habits give you maximum image quality from a minimal camera kit.
Plan Light and Weather, Not Just Locations
Apps and maps are useful, but the key is to think about light. Ask yourself a few simple questions before each hike.
- Where will the sun rise or set compared to this view?
- Is this scene better with side light, back light, or soft cloudy light?
- Do I need to reach the ridge before sunrise, or is late afternoon enough?
Arrive early and stay late. A minimal kit makes this easier because you are less tired and can move faster between viewpoints.
Use Your Tripod Only When It Truly Helps
A tripod is important for some shots, but it is also one of the heaviest items in your kit. To keep your hiking camera setup minimal, use it with care.
- Shoot handheld for bright daytime scenes and casual trail shots.
- Save the tripod for blue hour, night skies, long exposures, and very exact framing.
- When you set it up, slow down and make two or three strong frames instead of many random ones.
This approach keeps your pace smooth and your pack weight worth it. It also keeps your minimal kit from feeling like a burden.
Work With One Lens Instead of Fighting It
If you chose a minimal kit with one main lens, embrace that choice. Let it shape your style instead of fighting it.
- With a wide lens, get close to rocks, flowers, or streams to add depth.
- With a standard zoom, look for layers of hills, light on trees, and trail curves.
- Use your feet to change the scene rather than wishing for a different focal length.
This simple habit is why many travel and street photographers love fixed-lens cameras. They stop thinking about gear and focus on seeing.
Keep Your Camera Ready and Protected
A camera that stays in the pack does not make photos. At the same time, you do not want it swinging into rocks or soaking in a sudden shower.
Here is a simple system that works well with a minimal kit and a Camstrap strap:
- Carry the camera on your chest or hip using a Camstrap Voyager, Explorer, or Nomad.
- Keep a small microfiber cloth in your pocket to wipe the lens and filters.
- In light rain, tuck the camera under your jacket between shots.
- In heavy rain, drop it into a small dry bag inside your pack until the storm eases.
Camstrap straps are built to be tough and weather-resistant. You do not need to baby them. They can handle wet straps, sweat, and rough use on the trail while you keep your minimal kit close.
Buying Smart: Building Your Minimal Kit Over Time
You do not need to buy everything at once. Building your minimal camera kit step by step is often better. You learn what you really use and avoid wasted money and weight.
Step 1: Start With What You Already Have
Before you shop, look at your current gear. Can you hike with just one body and one lens for a few trips? If yes, do that first and see how it feels.
Use a simple strap, even an old one, and notice what slows you down or hurts. After a few hikes, write down what truly bothered you. Maybe your neck strap dug in. Maybe your tripod felt too heavy. These notes guide your next move.
Step 2: Upgrade Your Carry System
Often the best first upgrade for a minimal kit is not a new lens. It is a better way to carry the camera. A high-quality strap like a Camstrap Voyager, Explorer, or Nomad can make your current camera feel new on the trail.
Because Camstrap offers free shipping over €70 and a “buy one, get the second at 20% off” deal, many hikers grab two straps at once. For example:
- Voyager for your main mirrorless body
- Nomad for a second body or for a friend or partner
This still fits the minimal idea. You are not adding more cameras, just making your current setup easier to carry and use.
Step 3: Add Only What Solves a Real Problem
Once your carry system feels good, add new gear only when you hit a clear limit. This keeps your minimal camera kit focused and lean.
- If your night shots are always blurry, consider a better tripod or a body with IBIS.
- If your skies look flat and washed out, add a CPL.
- If your shoulders hurt with a heavy DSLR, move to a lighter APS-C body.
Each new piece should fix a problem you have seen many times, not a problem you only imagine. This is the heart of a minimal kit.
Conclusion: Minimal Kit, Maximum Freedom on Every Trail
A minimal hiking camera kit is not about owning less just to be “minimal”. It is about carrying only what you need to make the photos you love. You leave behind anything that gets in the way of your time outside.
With one solid camera body, one main lens, a small set of filters, a light tripod, and a well-designed strap like the Camstrap Voyager, Explorer, Nomad, or MagClip, you can hike far and move fast. You still capture pro-level landscapes in 2025 while your minimal kit stays light and easy.
Travel enthusiasts gain freedom in airports and cities. Outdoor adventure photographers stay safer and more stable on rough ground. Amateur photographers enjoy learning without feeling buried in gear. All of them benefit from a minimal approach that keeps focus on light, framing, and the joy of being outside.
Start small, carry less, and pay attention to what you truly use. Over time, your minimal camera kit will feel like a natural part of your body, not a burden on your back. That is when you know you have reached maximum freedom on the trail, with a minimal setup that is as light and clear as the mountain air around you.


