
Travel Photography Tips: Capturing Boston's Iconic Landmarks This Season
Boston is one of the best cities for travel photography in the United States. It mixes old brick streets, modern glass towers, and a busy harbor. This season is a great time to visit, walk the city, and start capturing Boston's iconic landmarks with fresh eyes.

In this guide, you will find simple and practical tips for better travel photos. You will also learn where to shoot in Boston, when to go, and how to move safely with your camera. Whether you use a phone, a compact camera, or a DSLR, these ideas will help you bring home photos you love.
Why Boston Is a Dream City for Travel Photography
Boston is small enough to walk, but rich enough to fill many memory cards. In one day of travel, you can shoot historic churches, glass towers, tree-lined parks, and the harbor. This mix gives your travel photo story strong variety without long drives or complex plans.
Local photographers say that places like Beacon Hill, Fan Pier, and the Public Garden stay popular all year. They offer strong leading lines, reflections, and classic city views. Because many spots sit close together, you can move on foot and save time for shooting instead of commuting.

Best Seasons and Light for Capturing Boston’s Landmarks
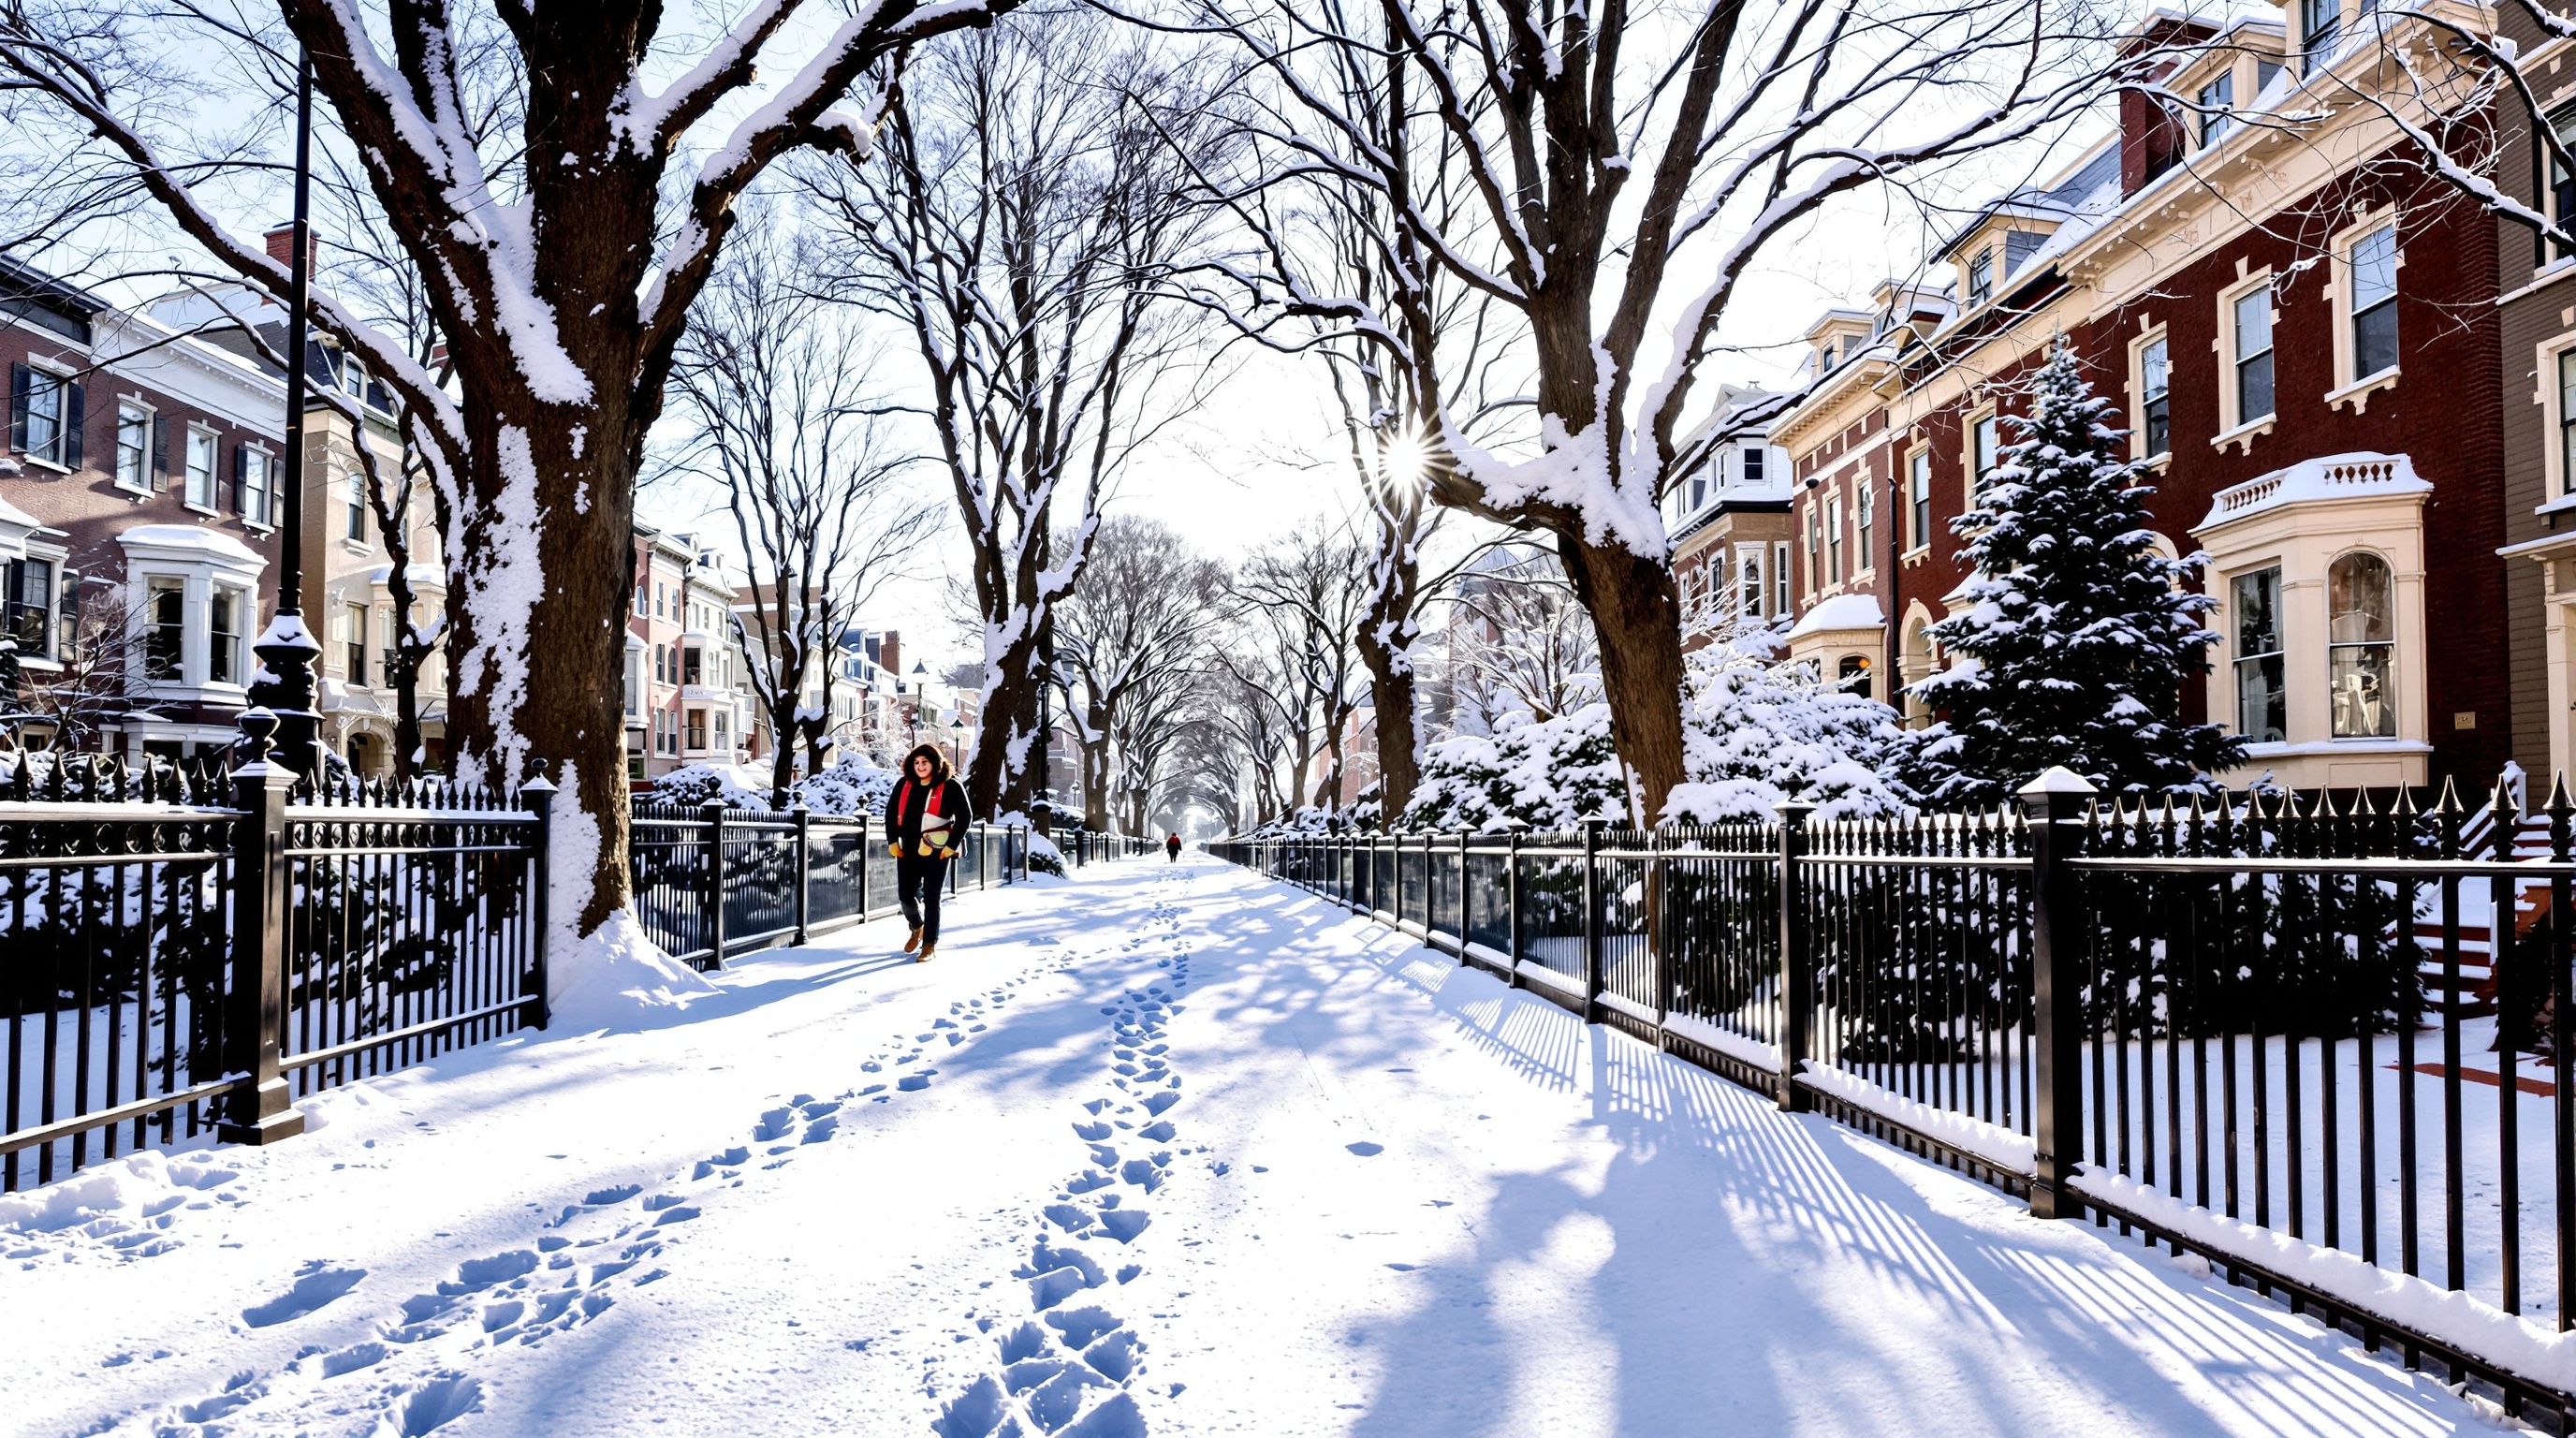
Each season in Boston has its own mood. Fall brings bright leaves along Commonwealth Avenue Mall and in the Public Garden. Winter adds snow to Beacon Hill and the Boston Common. The old brick streets can look like a movie set.
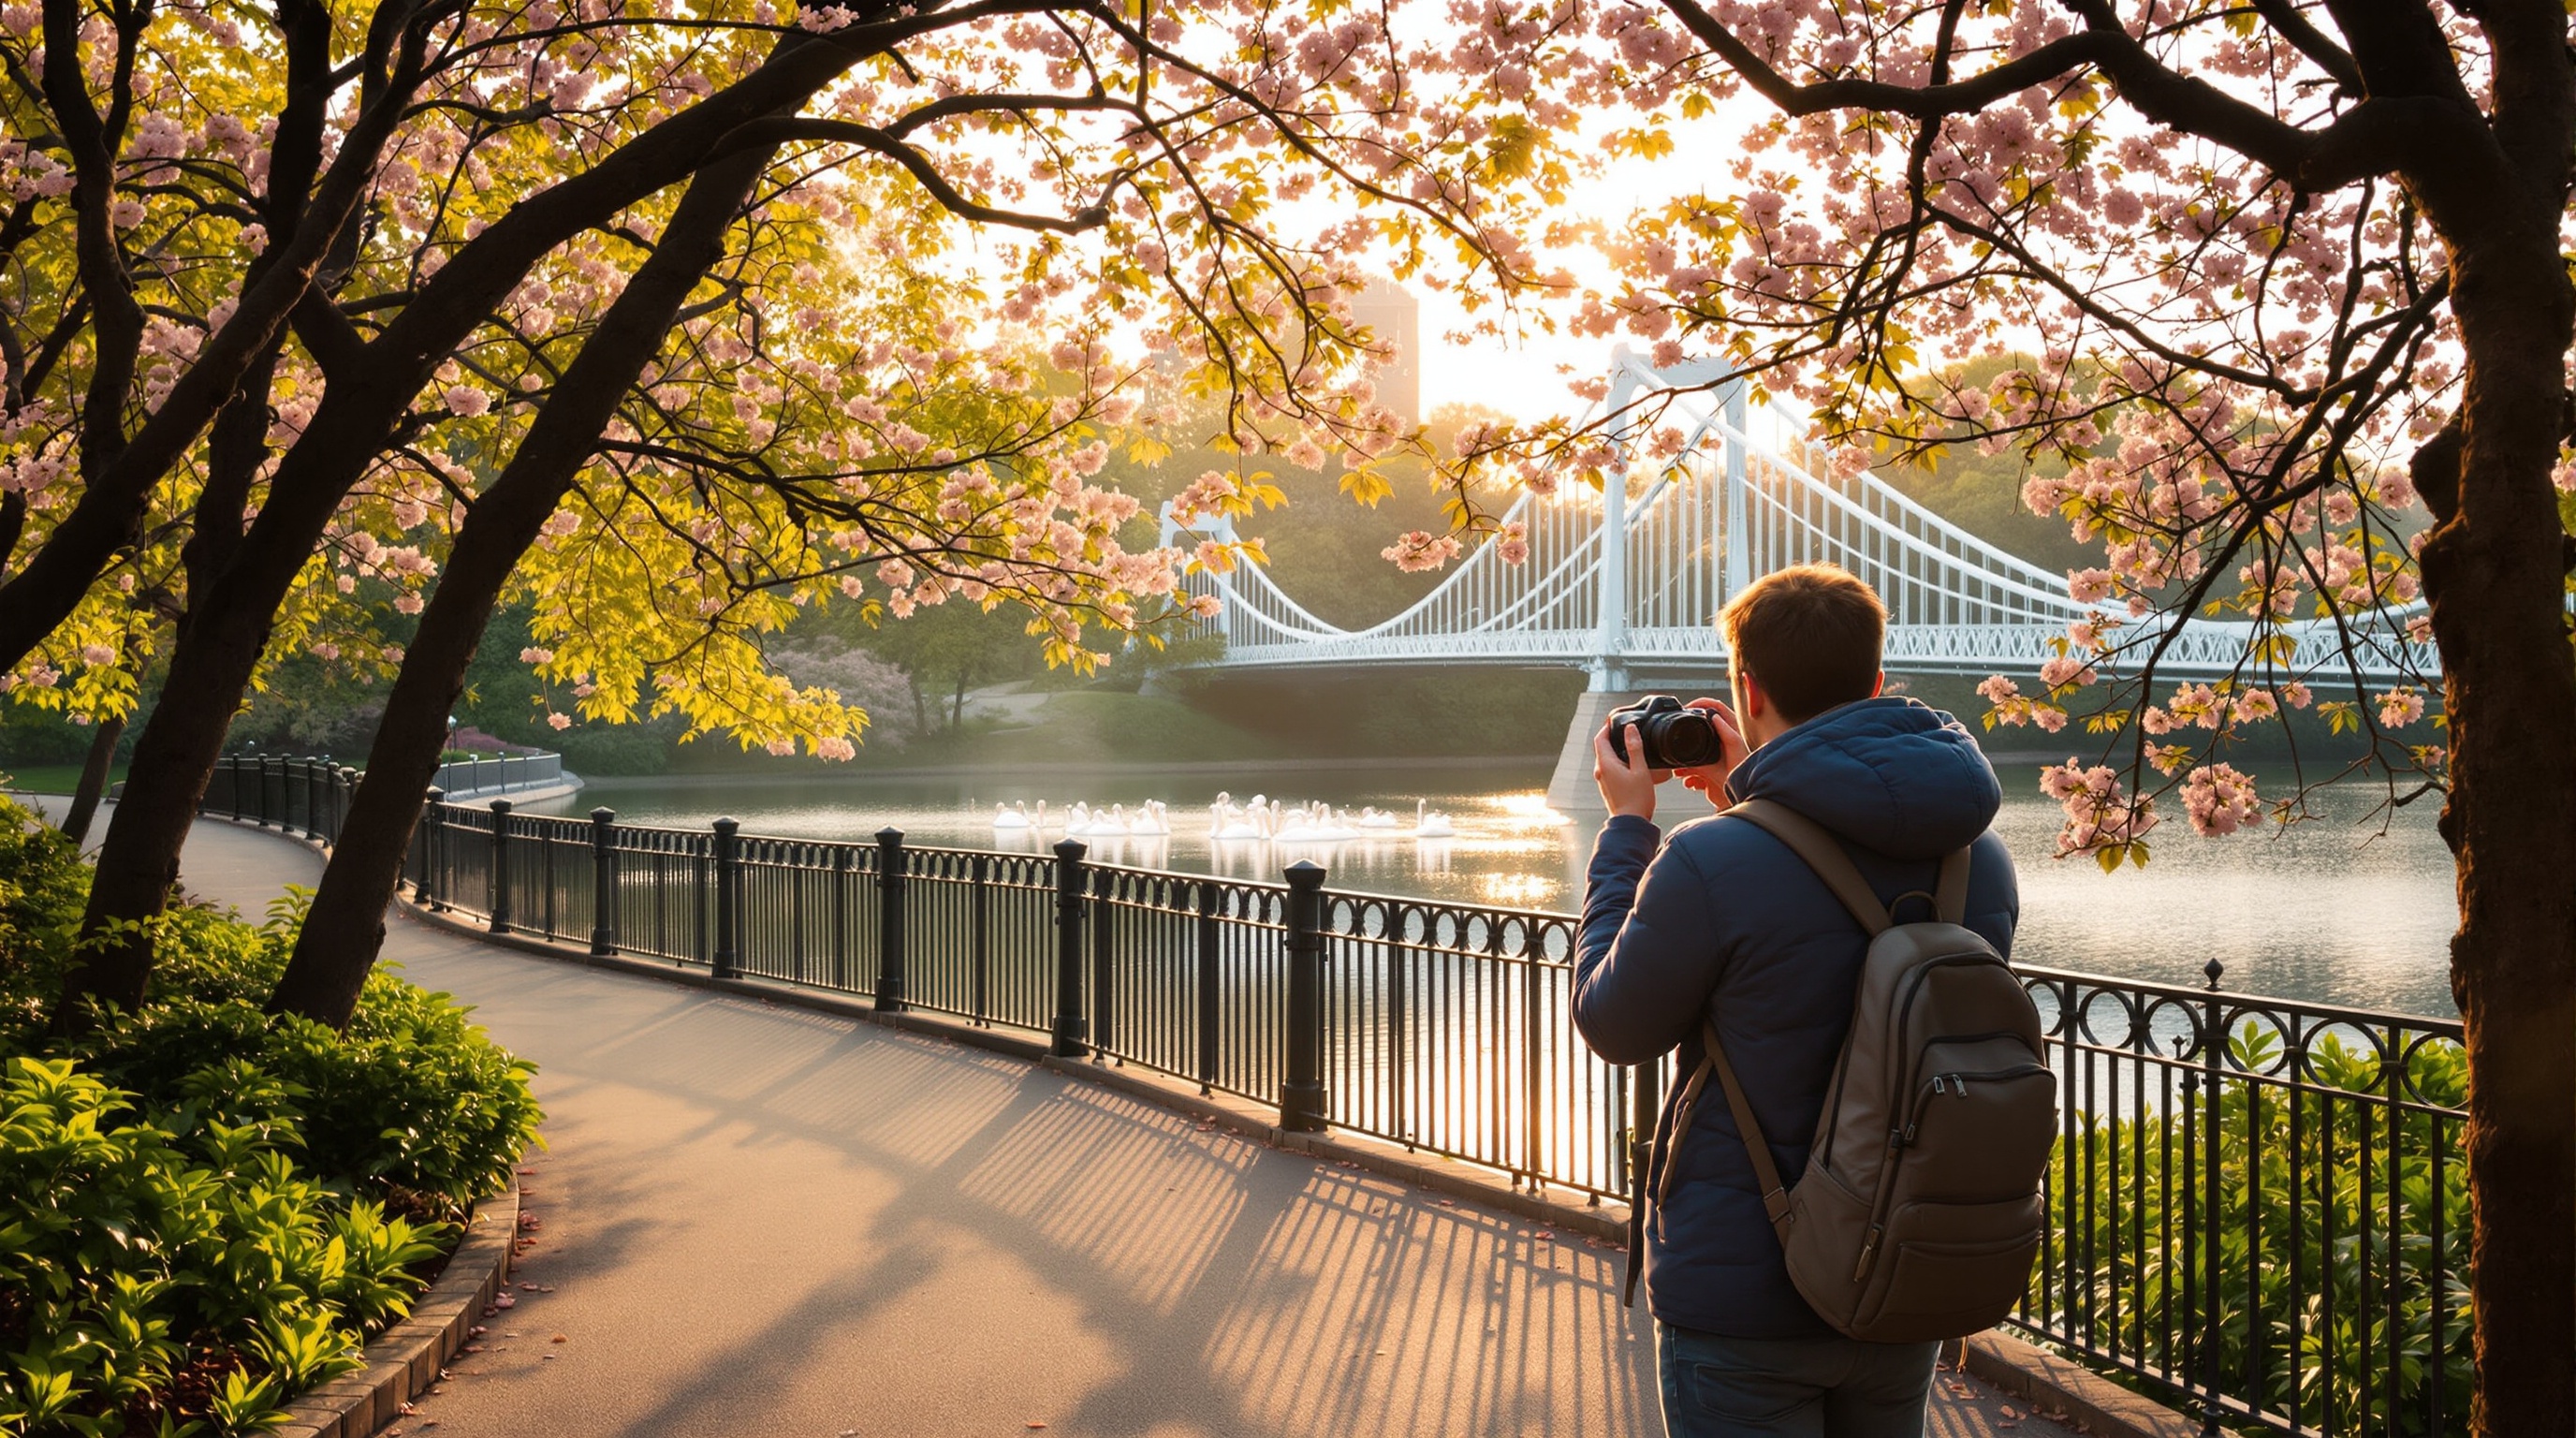
Spring and summer bring flowers, green trees, and warm sunsets by the harbor. For travel photography, light matters more than gear. Aim to shoot during “golden hour,” which is the first hour after sunrise and the last hour before sunset. The low sun gives soft light and long shadows, so details in stone and brick look gentle and clear.
Essential Travel Photography Tips for Boston
Before we talk about each landmark, it helps to learn a few simple travel photography tips. These ideas work anywhere, but they feel very useful in a dense city like Boston. They help you avoid flat photos and capture scenes that feel alive.
1. Keep Your Camera Ready, But Your Hands Free
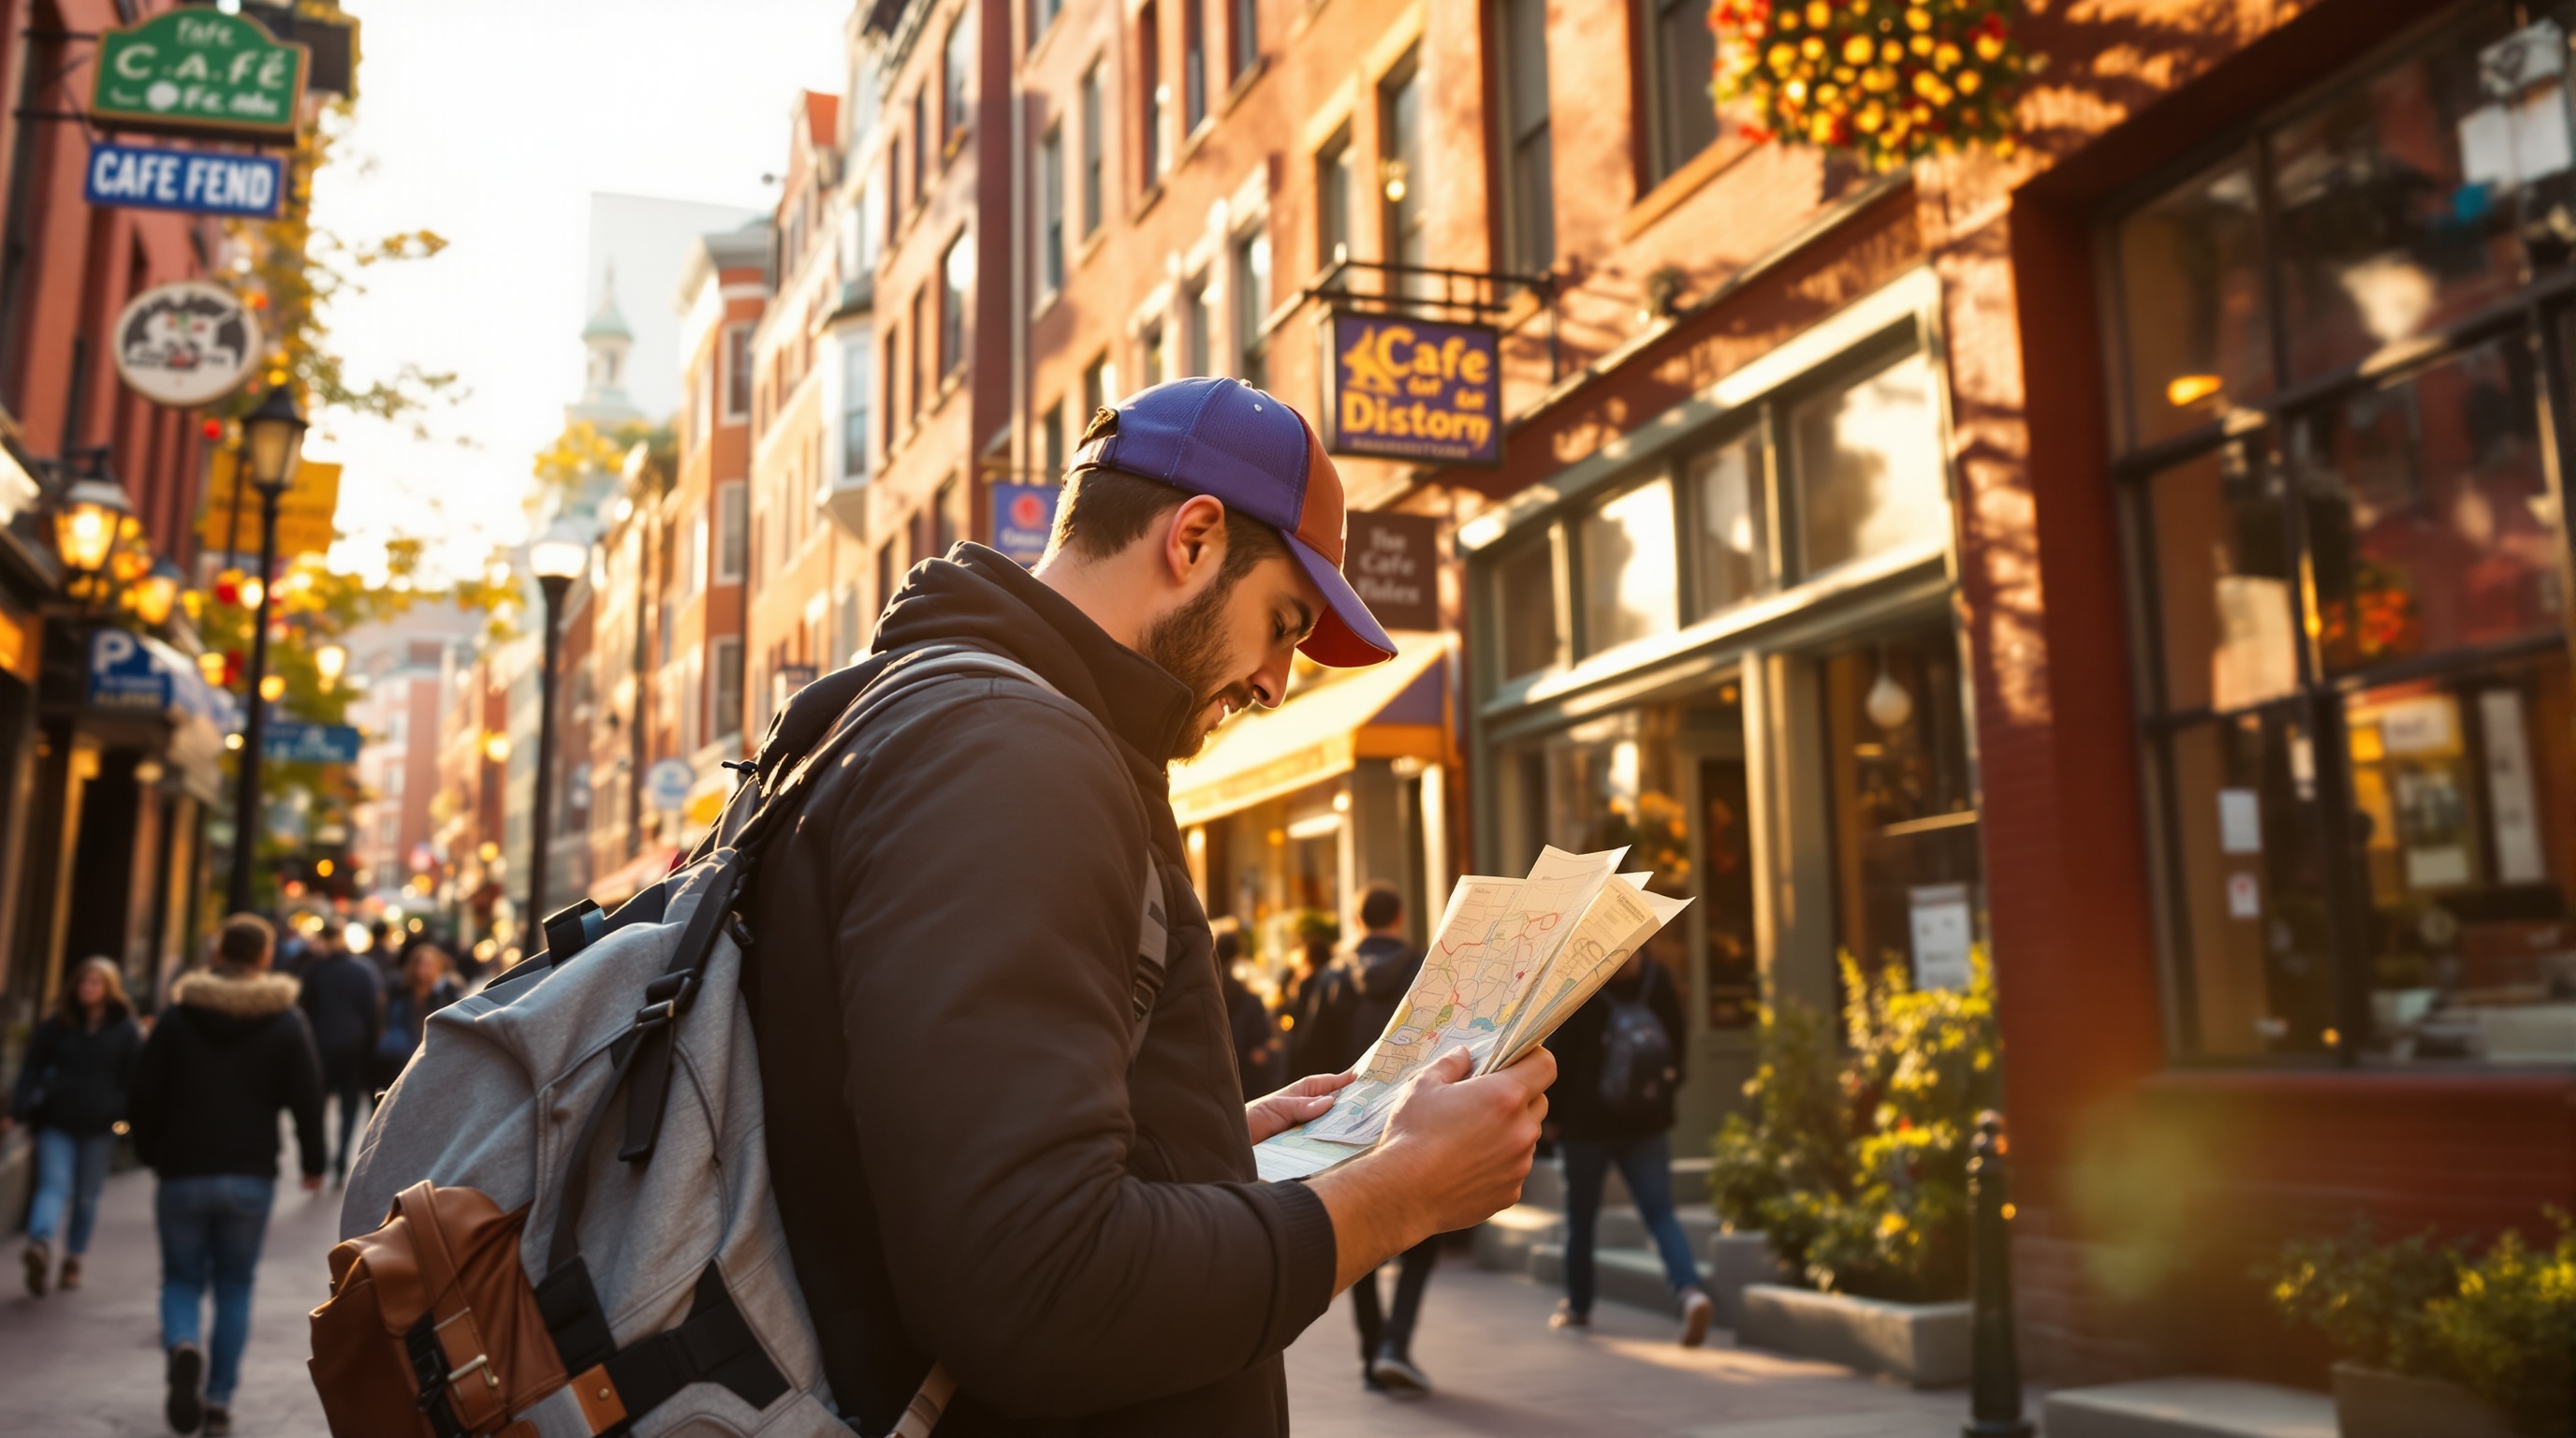
Boston travel days often run long. You may walk miles from the North End to the Seaport and then back through Back Bay. Holding a camera in your hand all day gets tiring and risky. You might set it down in a café or drop it while crossing a busy street.
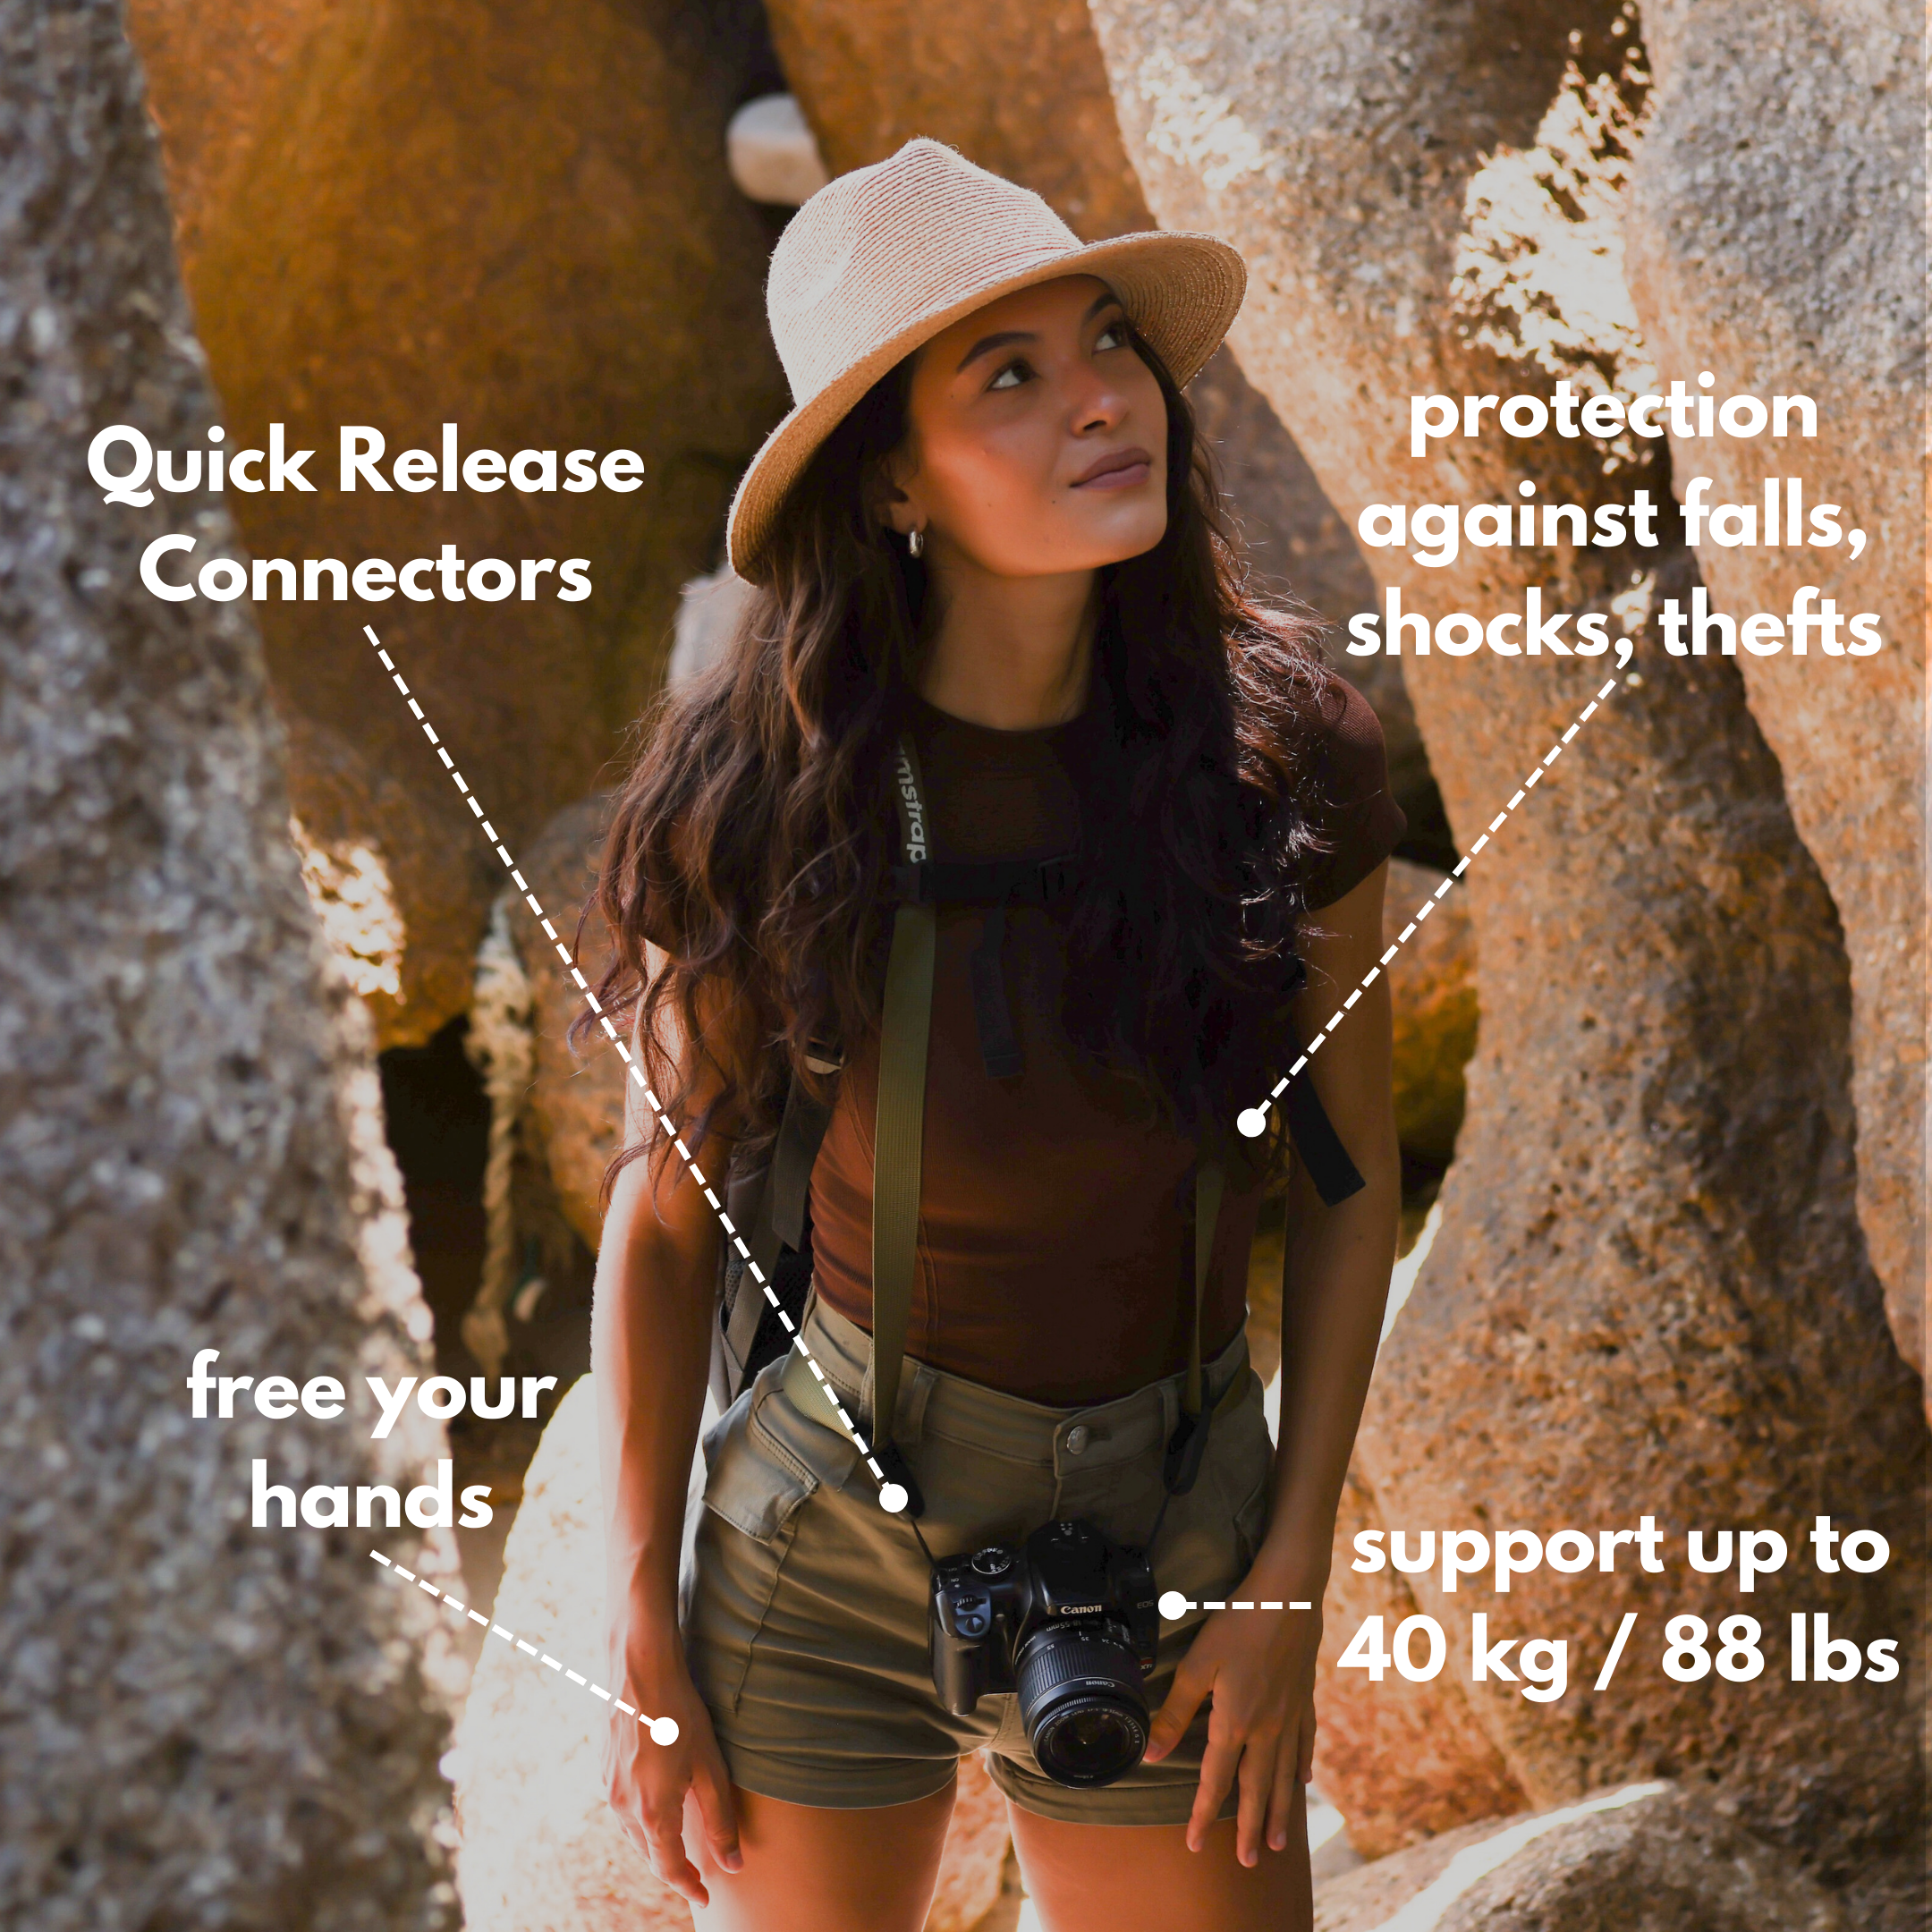
A good camera strap keeps your gear safe and close. Your hands stay free for maps, coffee, or subway rails. This is where a brand like Camstrap matters for travel photographers. The Camstrap Voyager spreads the weight across your shoulder and neck, so long days feel easier.

With a Camstrap, your camera rests at your hip. You can lift it and shoot in seconds when a moment appears. This quick access helps you catch surprise scenes on your travel walks through Boston.
2. Use Simple Settings You Can Trust
When you travel, scenes change fast. A child runs across Acorn Street, or a sailboat moves under the Zakim Bridge. You do not want to miss the moment because you are lost in menus. So keep your settings simple and easy to repeat.
- Use aperture priority mode (A or Av) for most city scenes.
- Choose f/5.6 to f/8 for sharp buildings and streets.
- Set ISO to auto with a max around 1600 or 3200.
- Use continuous autofocus for people and moving subjects.
This setup works well from Fan Pier to Copley Square. You can focus on composition and timing instead of numbers. That makes travel photography in Boston feel smoother and more fun.
3. Look for Layers, Not Just Landmarks
Many travel photos show only the building. The best images also add people, light, and small details. In Boston, try to place layers in your frame so the scene feels deep.
At Fan Pier, use the heavy metal chains as the front layer. Place the harbor water in the middle and the skyline in the back. On Beacon Hill, frame a doorway with flowers in front. Let the cobblestones lead the viewer into the distance.
These layers add depth and make people feel like they can step into your travel scene. Simple choices like this can turn a basic shot into a strong one.
4. Shoot Wide and Tight at Each Spot
When you capture Boston’s famous places, it is easy to stop after one wide shot. But your travel story gets richer if you mix wide and tight frames. At the Public Garden footbridge, take one wide photo that shows the whole scene.
Then move closer. Capture the iron details or the reflection of a swan boat in the water. In Copley Square, shoot the whole square with both Trinity Church and the Hancock Tower. Then zoom into the church doors, stone carvings, or glass reflections.
This simple habit gives you more variety from each stop. Later, your travel gallery will feel more complete and interesting.
Top Boston Landmarks to Capture on Your Next Travel Shoot
Now let’s walk through some of Boston’s most iconic landmarks for photography. These spots appear often in travel guides and local blogs because they work in many seasons and at many times of day. You do not need to visit all of them in one trip, but they form a strong base plan.
Beacon Hill and Acorn Street
Beacon Hill may be the most famous neighborhood to capture in Boston. Its narrow streets, gas lamps, and brick sidewalks feel like a step back in time. Acorn Street is often called one of the most photographed streets in the city.
For travel photography, go early in the morning or right after a light snow. Early light keeps the crowds away and adds soft shadows on the bricks. Try shooting from low to the ground to show the cobblestones as a strong leading line.
Then turn around and look back down the street. Often the reverse view is even better. Take a few frames both ways so you have options later.
Boston Public Garden and Boston Common
The Public Garden and the Boston Common sit side by side and form the city’s green heart. The Public Garden is the oldest public botanical garden in the country. Its lagoon, swan boats, and statues give many chances for calm travel photos.
Walk the paths and look for reflections in the water. The small footbridge works well at sunrise when the sky colors reflect in the lagoon. In spring, frame the George Washington statue with tulips or flowering trees. In fall, use bright leaves as a soft frame around your subject.
Fan Pier and the Seaport Skyline
Fan Pier in the Seaport District offers one of the most iconic views of Boston’s skyline. Many travel guides use this exact scene on their covers. From the cobblestone walk and thick chains, you can capture the harbor in front and the glass towers behind.
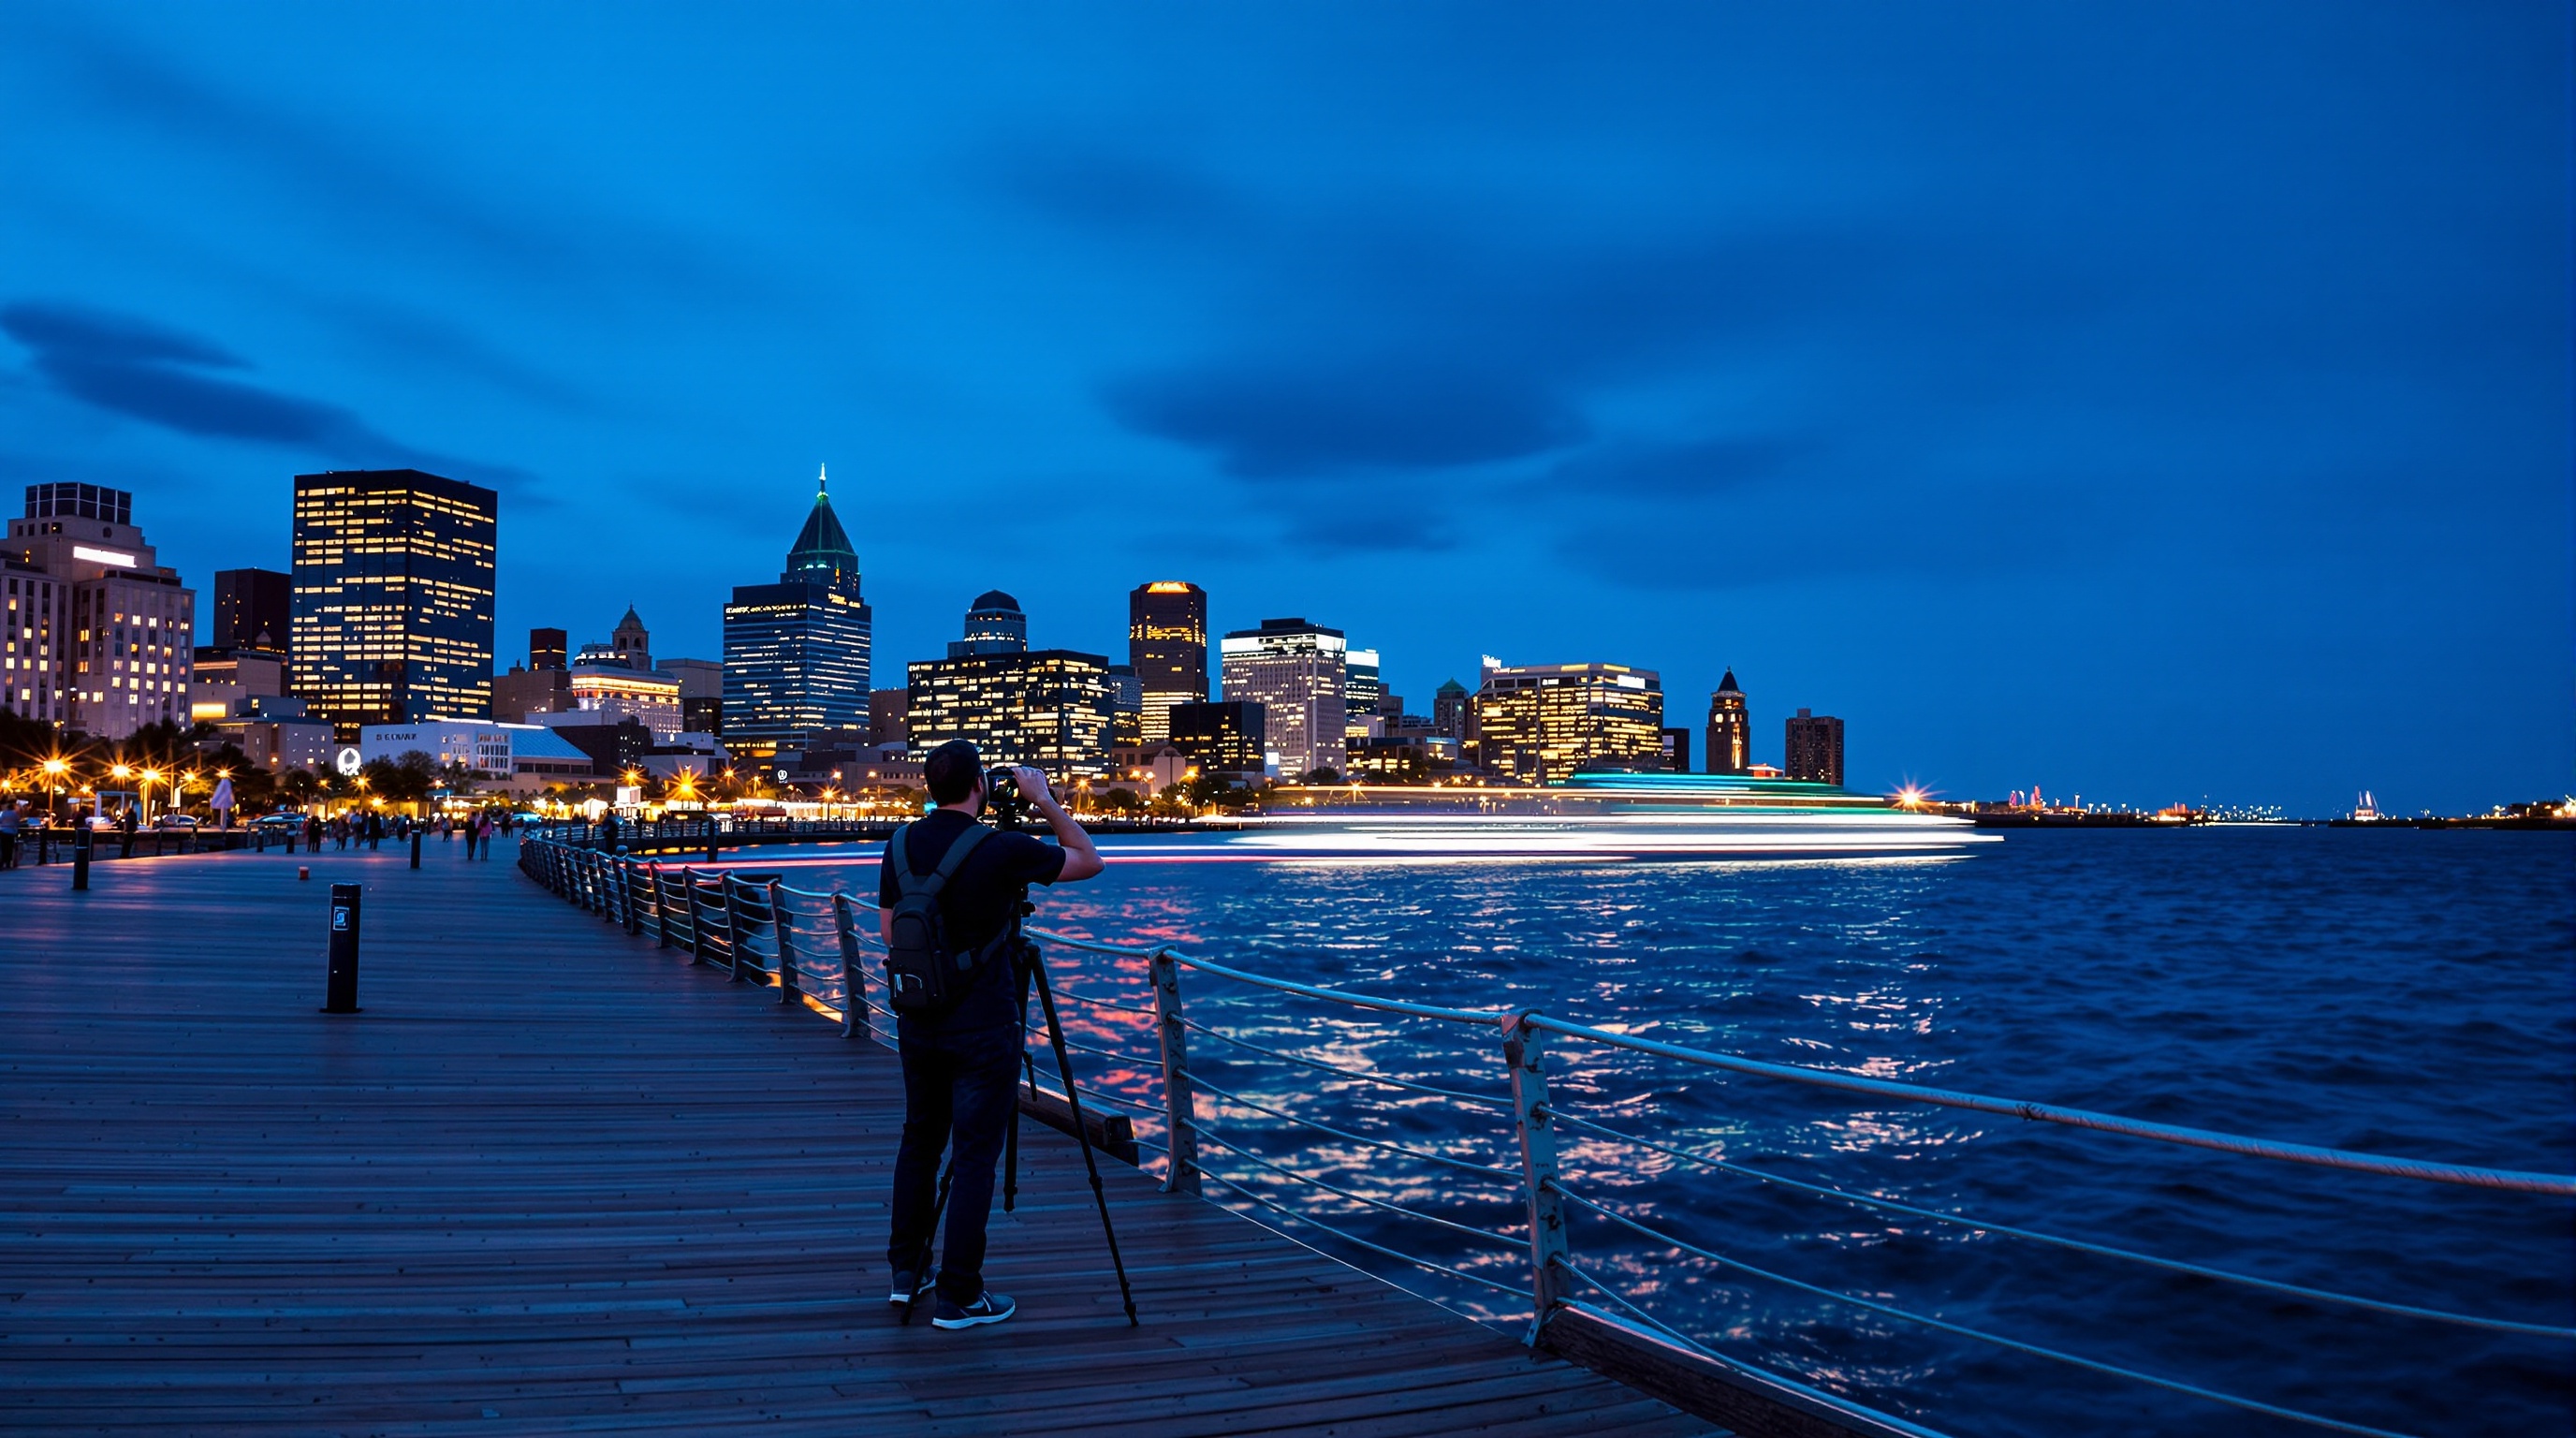
Visit at sunrise or sunset for the best light. At sunrise, the city may glow in pink and orange tones. At sunset, the sky lights up behind the buildings and the water reflects the colors.
Use a tripod if you have one. If not, brace your camera on a post or railing for sharp shots in low light. A steady hand matters more than fancy gear for night travel photos.
Zakim Bridge from North Point Park
The Leonard P. Zakim Bridge is a modern icon of Boston. North Point Park across the river gives some of the best angles for capturing it. You can use paths, railings, and the water’s edge as leading lines toward the tall white towers.
In spring and summer, flowers and green trees add color to the scene. Try framing the bridge with branches or using calm water for mirror-like reflections. If you walk along the paths, you can find views that also include TD Garden or the train tracks.
Copley Square and the Boston Public Library
Copley Square is a rich spot for travel photography because it mixes several key buildings in one place. Trinity Church sits across from the glass Hancock Tower. The Boston Public Library adds stone arches, courtyards, and a grand reading room.
Stand in the square and look for ways to show old and new together. For example, frame Trinity Church reflected in the windows of the Hancock Tower. Inside the library, Bates Hall offers long rows of lamps and books.
Use a wide lens and stand at one end of the hall. Let the lines of tables and lights pull the viewer into the frame. This simple setup gives a classic travel image from Boston.
Hyatt Regency Boston Harbor and East Boston Parks
On the East Boston side, near the Hyatt Regency Boston Harbor, you get wide views of the skyline across the water. Local photographers like parks such as Piers Park and LoPresti Park. These parks let you frame old pier posts, boats, and the city in one shot.
These spots are great for sunset travel photos. Look for old wooden pilings or metal posts in the water. Place them in the foreground and let the skyline sit beyond them.
This adds depth and a strong sense of place. On clear nights, you can also capture city lights reflecting in the harbor. That makes bold blue-hour shots for your travel gallery.
Boston University Bridge and the Charles River
The Boston University Bridge gives a lovely view of the Charles River and the skyline. From here, you can see long rowing boats, small sailboats, and the city rising behind the water. In fall, trees along the river turn bright yellow and red.
Use the wide sidewalk for safe shooting. Aim for early morning when the water is calm and the light is soft. Try placing the bridge rail in the frame as a diagonal line.
You can also walk down to the paths under the bridge. From there, include the bridge structure in your composition. These simple moves give you several travel looks from one location.
Gear and Safety Tips for Travel Photographers in Boston
Boston is a safe city for most travelers, but it still helps to think about your gear and comfort. You may move through crowded areas like Quincy Market, narrow alleys in the North End, or busy subway platforms. Good planning lets you focus on capturing, not worrying.
Choosing the Right Camera and Lenses
You do not need heavy gear to capture Boston’s landmarks. Many local shooters work with a simple setup. One camera and one or two lenses are often enough for travel.
For most city scenes, a zoom like 24–70mm or a small prime like 35mm gives plenty of range. If you enjoy details and portraits, add a short telephoto like 50mm or 85mm. This helps you pick out statues, faces, or patterns in brick and glass.
If you use a phone, learn how to switch between wide and telephoto modes. Tap to set focus and exposure. Then slide your finger to adjust brightness before you shoot. These small steps can lift your travel photos fast.
Why a Good Strap Matters: Camstrap for Travel
Many travel photographers forget about the strap until it fails. Yet a good strap can shape how long you shoot and how safe your gear feels. Camstrap designs straps for people who walk a lot, hike, or shoot all day in travel cities like Boston.
- Camstrap Voyager: Great for long travel days. It spreads weight well and feels soft on your neck and shoulder.
- Camstrap Explorer: Ideal for outdoor adventure photographers. It uses strong and tough materials for rough weather and long hikes.
- Camstrap Nomad: Perfect for minimalist travel shooters. It stays light and slim, which works well with compact and entry-level cameras.
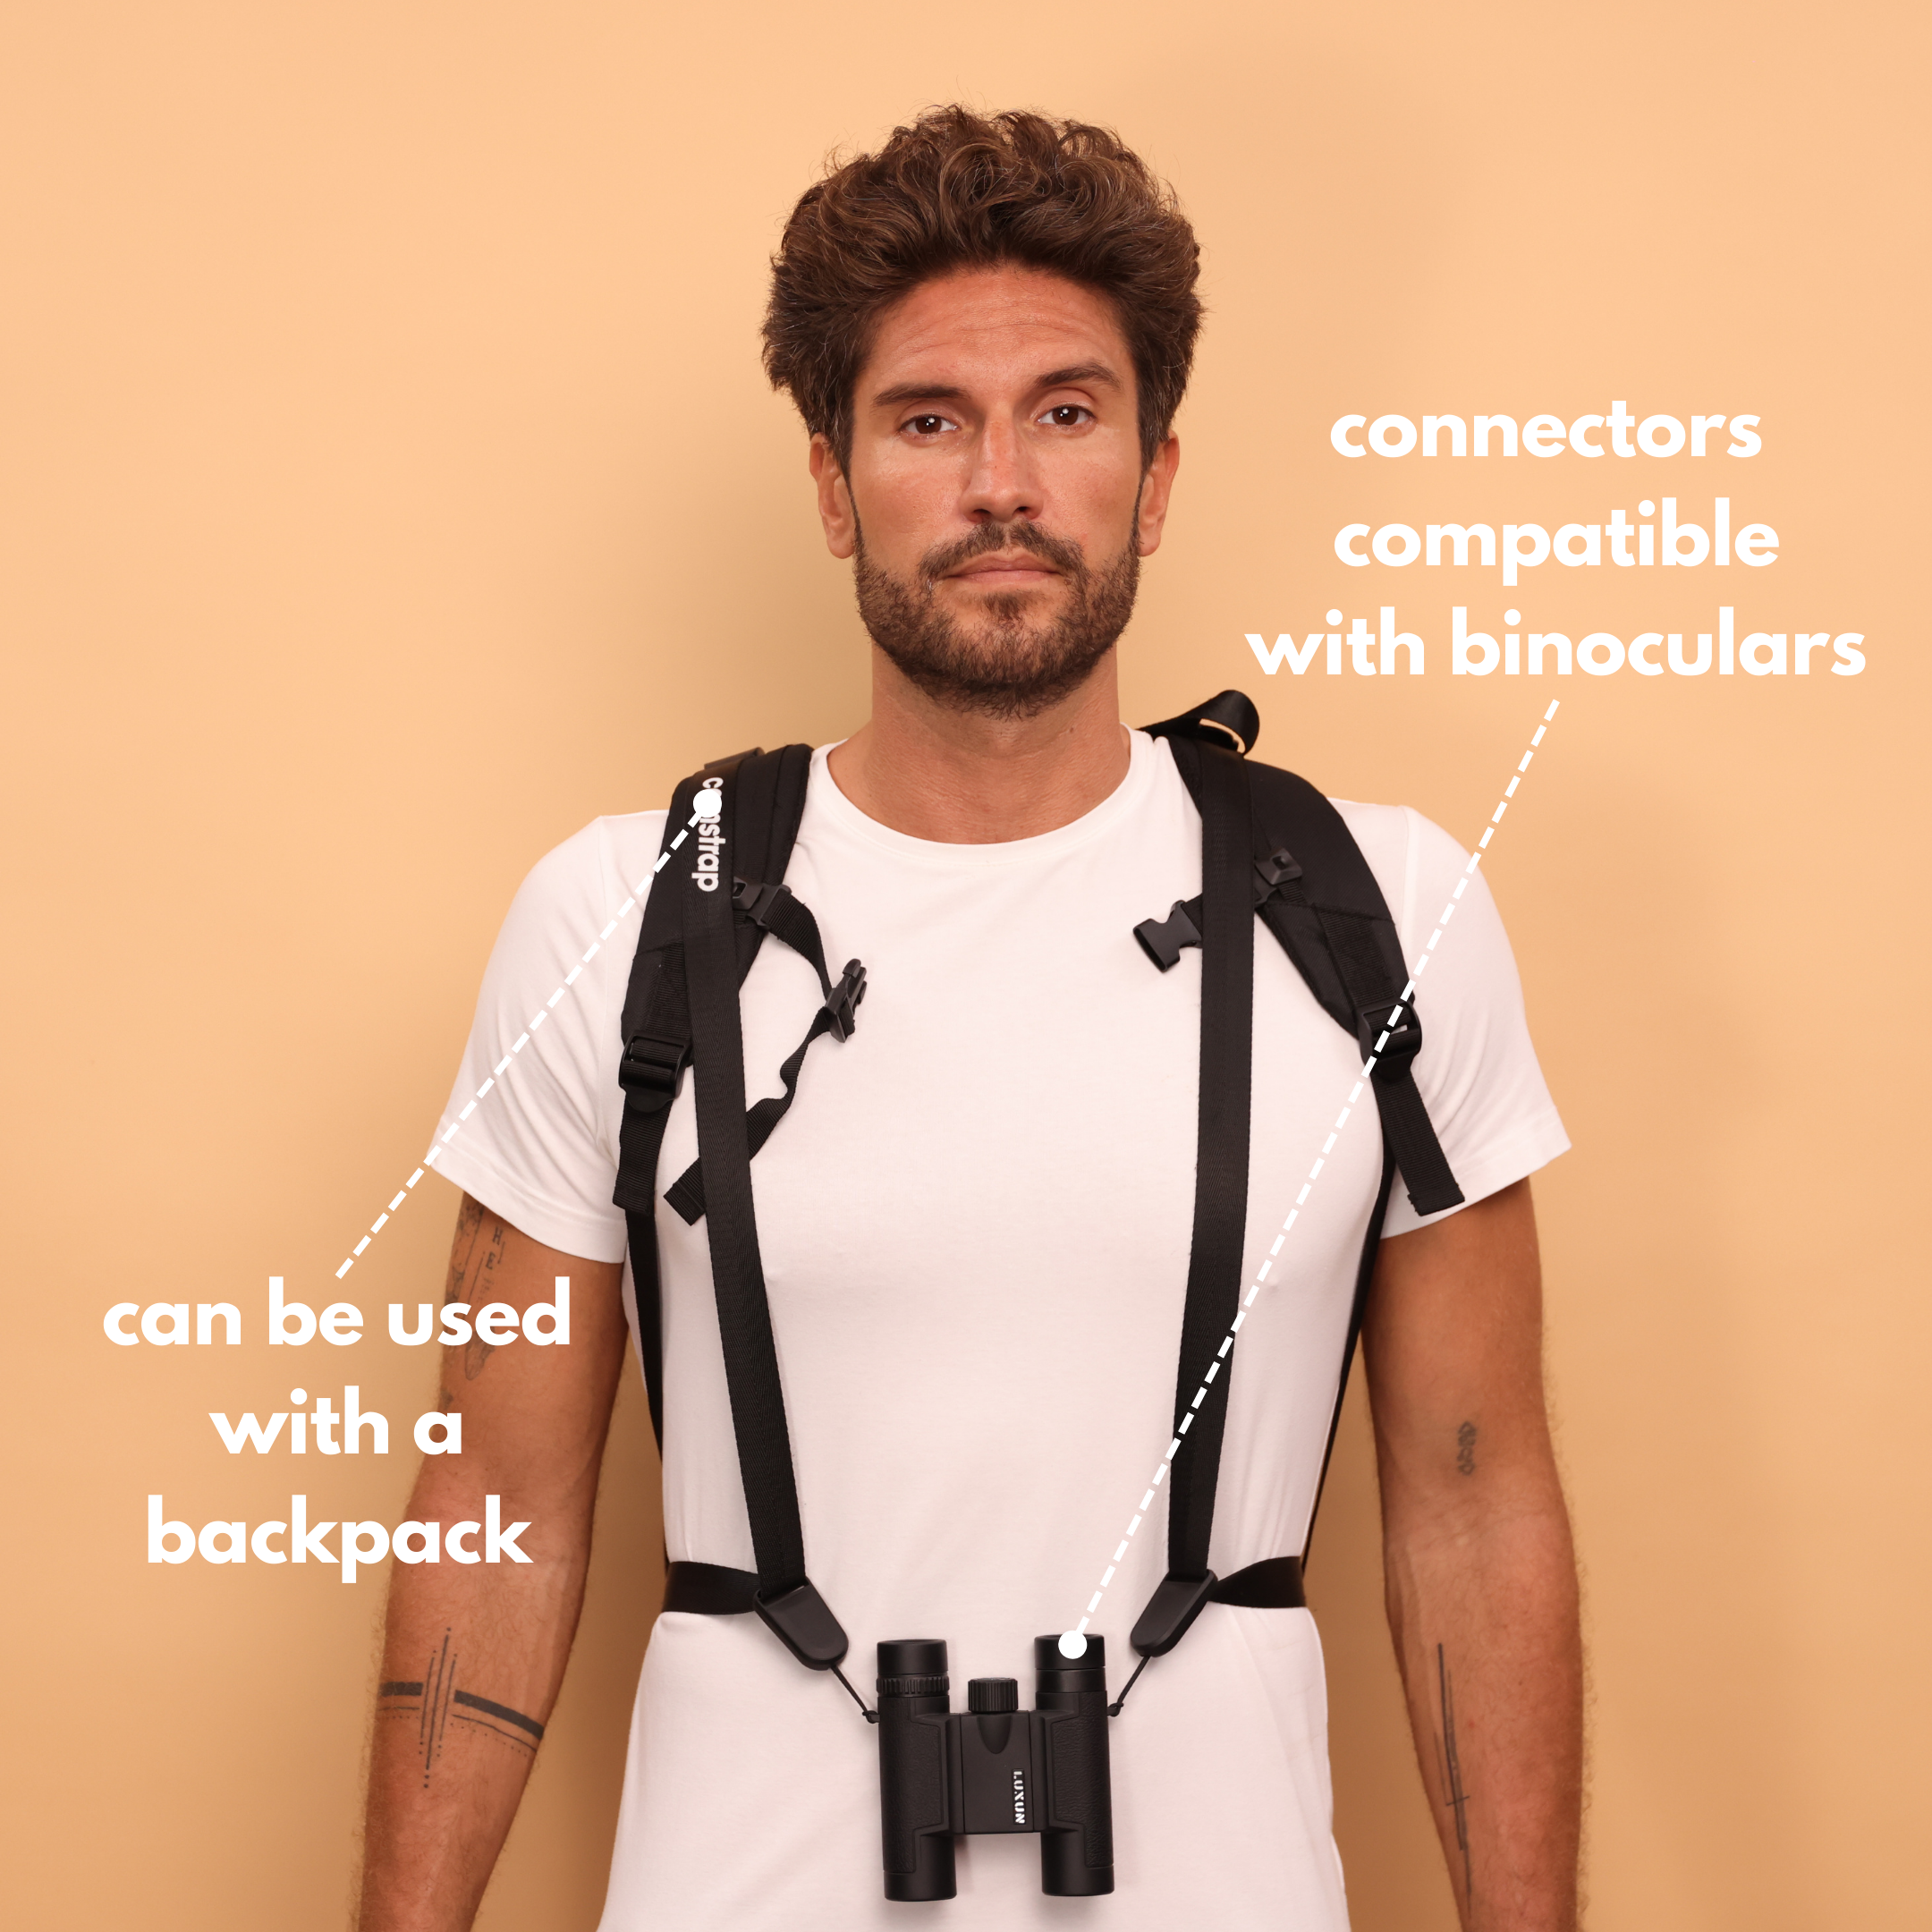
- Camstrap MagClip: A smart magnetic clip system that lets you attach or remove your strap in seconds.
All Camstrap products are invented and assembled in France with care and style. The brand blends classic craft with modern design, so your strap looks good and works hard. For travel fans, free shipping over €70 and a 30-day money-back promise add peace of mind.
Camstrap also offers 100% secure payment and tracked worldwide shipping. If you often carry two cameras, the “buy one, second at 20% off” offer can help a lot. Travel photographers, outdoor adventure shooters, and amateur creators can all find a Camstrap that fits their style.
Staying Safe While You Shoot
When you travel with a visible camera, it helps to stay aware. Keep your bag zipped and in front of you on the subway. In crowded markets or events, use a cross-body strap like the Camstrap Explorer or Nomad so your camera stays close to your chest.
A few simple habits can protect both you and your gear:
- Do not leave your camera on café tables or open chairs.
- Use a strap even when shooting near water or on bridges.
- Back up your photos each night to a cloud service or laptop.
- Carry a small microfiber cloth to wipe rain or sea spray from your lens.
These steps seem small, but they keep your travel photography trip smooth. You can relax and enjoy capturing Boston’s scenes instead of worrying about gear problems.
Simple Composition Tricks for Capturing Boston’s Character
Good travel photos are not just about what you shoot. They also depend on how you place things in the frame. Boston’s streets, parks, and skyline give you many shapes and lines to use.
With a few easy tricks, you can turn quick snapshots into strong and clear images. These ideas work well for travel photography in any city, but Boston is a great place to practice.
Use Leading Lines and Symmetry
Look for lines that guide the viewer’s eye. In Boston, cobblestone streets, bridge rails, and harbor chains all work as leading lines. On Acorn Street, let the stones lead from the bottom of the frame up toward the houses.
On the Zakim Bridge, use the cables as lines that pull the eye upward. Symmetry also works well in places like the Boston Public Library or the Public Garden footbridge. Stand in the center of a path or room and line up both sides evenly.
This creates a calm and balanced feel that fits historic spaces. Simple moves like this can make your travel photos look more planned and less random.
Include People to Tell a Travel Story
Landmarks alone can feel empty. To show the life of Boston travel, include people in your shots. Capture a runner along the Charles River or a couple on a bench in the Public Garden.
Kids chasing pigeons in the Common also add energy. You do not always need clear faces. Silhouettes, backs, or blurred figures crossing a street still bring motion and life.
Use a slightly slower shutter speed, like 1/30 or 1/60. This can show a bit of motion while the buildings stay sharp. Your travel photos will feel more real and less like postcards.
Work With Weather, Not Against It
Boston weather changes fast. You might start with sun at Fan Pier and end with fog near the harbor. Instead of fighting this, use it in your travel photography.
Fog can soften the skyline and make the Zakim Bridge look dreamy. Light rain can add reflections on bricks and streets. On bright days, look for shade under trees or on the north side of buildings.
This softer light works better for portraits and close-up details. On cloudy days, shoot colorful doors in Beacon Hill or murals in the South End. The even light keeps colors rich without harsh shadows.
Planning Your Travel Photo Route Through Boston
Because Boston is compact, you can plan a simple walking route that hits many top spots in one day. This helps you make the most of your travel time and light. You can always adjust the plan for your pace, but here is a sample flow that many photographers enjoy.
Morning: Parks and Beacon Hill
Start at sunrise in the Public Garden or Boston Common. Capture soft light over the lagoon, statues, and early dog walkers. Then walk up to Beacon Hill while the streets are still quiet and the light is gentle.
Explore Acorn Street, Chestnut Street, and small alleys as the sun climbs and hits the brick walls. Because you travel on foot, keep your gear light. One camera with a versatile lens and a comfortable strap like the Camstrap Voyager or Nomad will be enough.
This simple setup keeps your shoulders fresh for the rest of the day. You can stay focused on travel photography instead of sore muscles.
Midday: Copley Square and the Library
By late morning, head to Copley Square. Midday light can be harsh, but it still works for strong shapes and reflections. Shoot Trinity Church, Old South Church, and the Hancock Tower from different angles.
Then move inside the Boston Public Library, where the light is softer. In Bates Hall, be respectful and quiet. Use a higher ISO instead of flash to keep the mood natural.
Capture the long rows of lamps and readers to show a calmer part of your travel day. The contrast between busy streets and quiet halls makes a nice photo story.
Afternoon and Sunset: Seaport and Fan Pier
Later, walk or take the subway to the Seaport District. As the sun drops, explore the Harborwalk and Fan Pier. Use chains, posts, and piers as foreground elements.
Watch how the light changes on the glass towers and the water. Stay through blue hour, which is the short time after sunset when the sky turns deep blue. City lights turn on and windows glow.
You can capture reflections on the harbor and bright lines of light on the skyline. A strong strap like the Camstrap Explorer helps here. You may move between low angles, railings, and hand-held night shots, so you want your camera secure and ready.
Conclusion: Bring Home Strong Travel Photos From Boston This Season
Boston is a rich playground for travel photographers. Its historic streets, modern skyline, and changing seasons give you endless subjects. This season, you can capture Boston’s iconic landmarks in soft morning light, bright fall color, or calm winter snow.
With simple settings, smart routes, and a bit of patience, your travel photos can feel both classic and fresh. As you plan your travel, think not only about what you will shoot. Also think about how you will carry your gear during long days.
A well-made strap from Camstrap, like the Voyager, Explorer, Nomad, or a MagClip system, can make travel smoother and safer. Camstrap blends comfort, strength, and style, so your camera stays ready while your hands stay free. That way, you stay focused on the story in front of you, not the weight on your neck.
So pack light, charge your batteries, and step out into Boston’s streets. Walk the Freedom Trail, pause at Fan Pier, wander Beacon Hill, and rest in the Public Garden. With these travel photography tips in mind, you will be ready to capture Boston’s iconic landmarks and bring home images that keep your memories bright for years to come.


